Utilizing Microsoft Entra ID (formerly Azure AD), you can seamlessly enable Single Sign-On (SSO) alongside SCIM integration, streamlining user management within UTunnel.
This guide simplifies the steps to configure SSO and SCIM on Entra ID and integrate it with UTunnel, ensuring effortless login and easy user management.
Please note that these instructions will involve repeatedly switching between your identity provider and the UTunnel web console. If you need any assistance, our support team is always ready to help.
Step 1: Begin by accessing the UTunnel web dashboard on your browser. Navigate to Organization > Single Sign On > Entra ID (Azure AD). Here, select the Enable Azure checkbox. This is the crucial first step in the process.
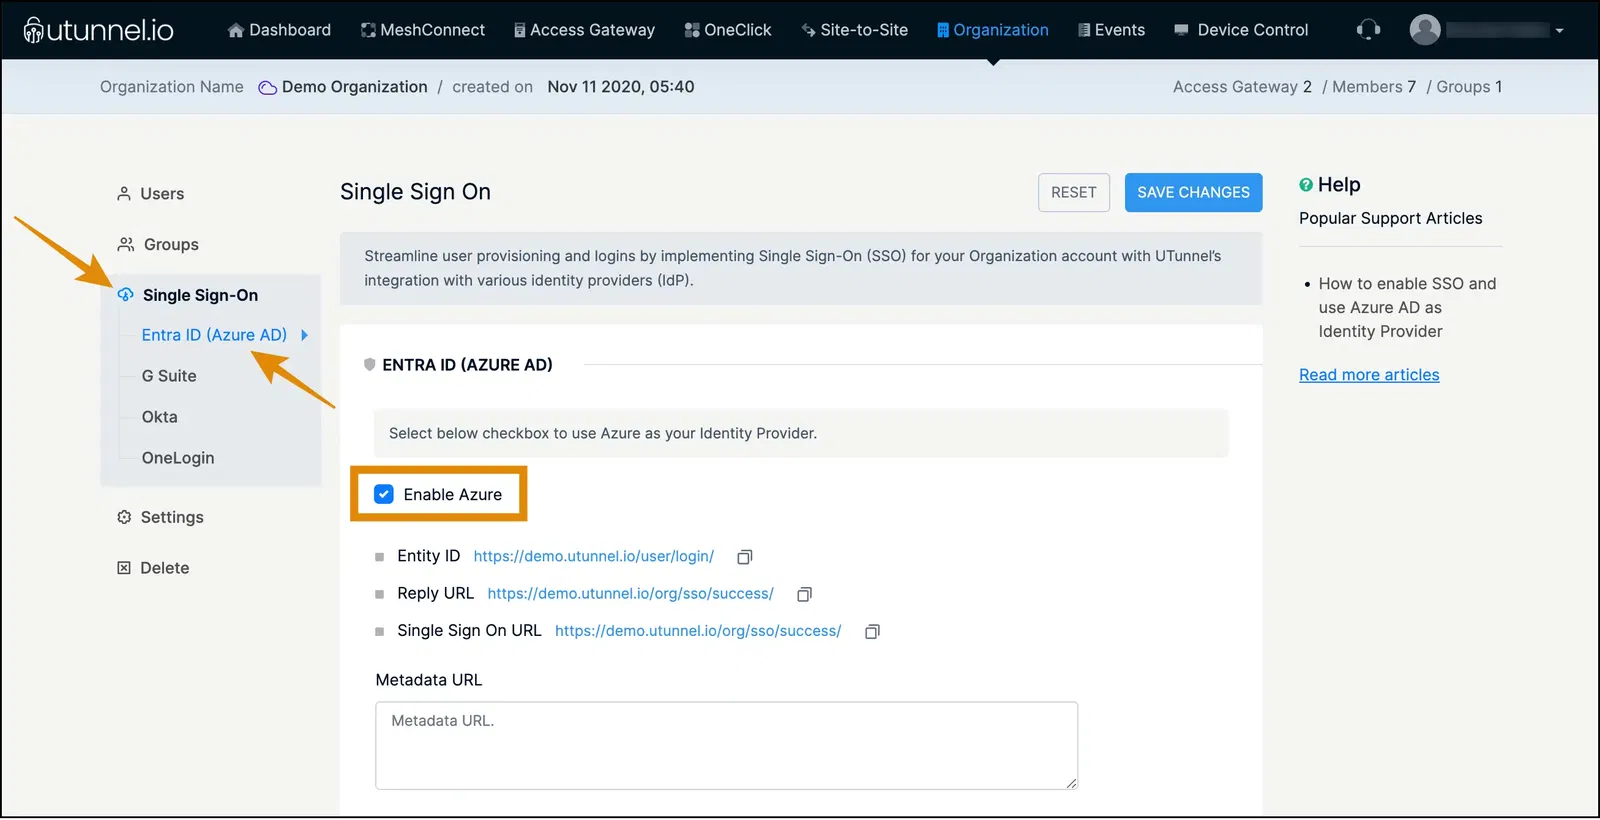
It's important to keep the UTunnel web dashboard open, as the details displayed here will be required in the following steps. This will ensure a smooth and uninterrupted configuration process.
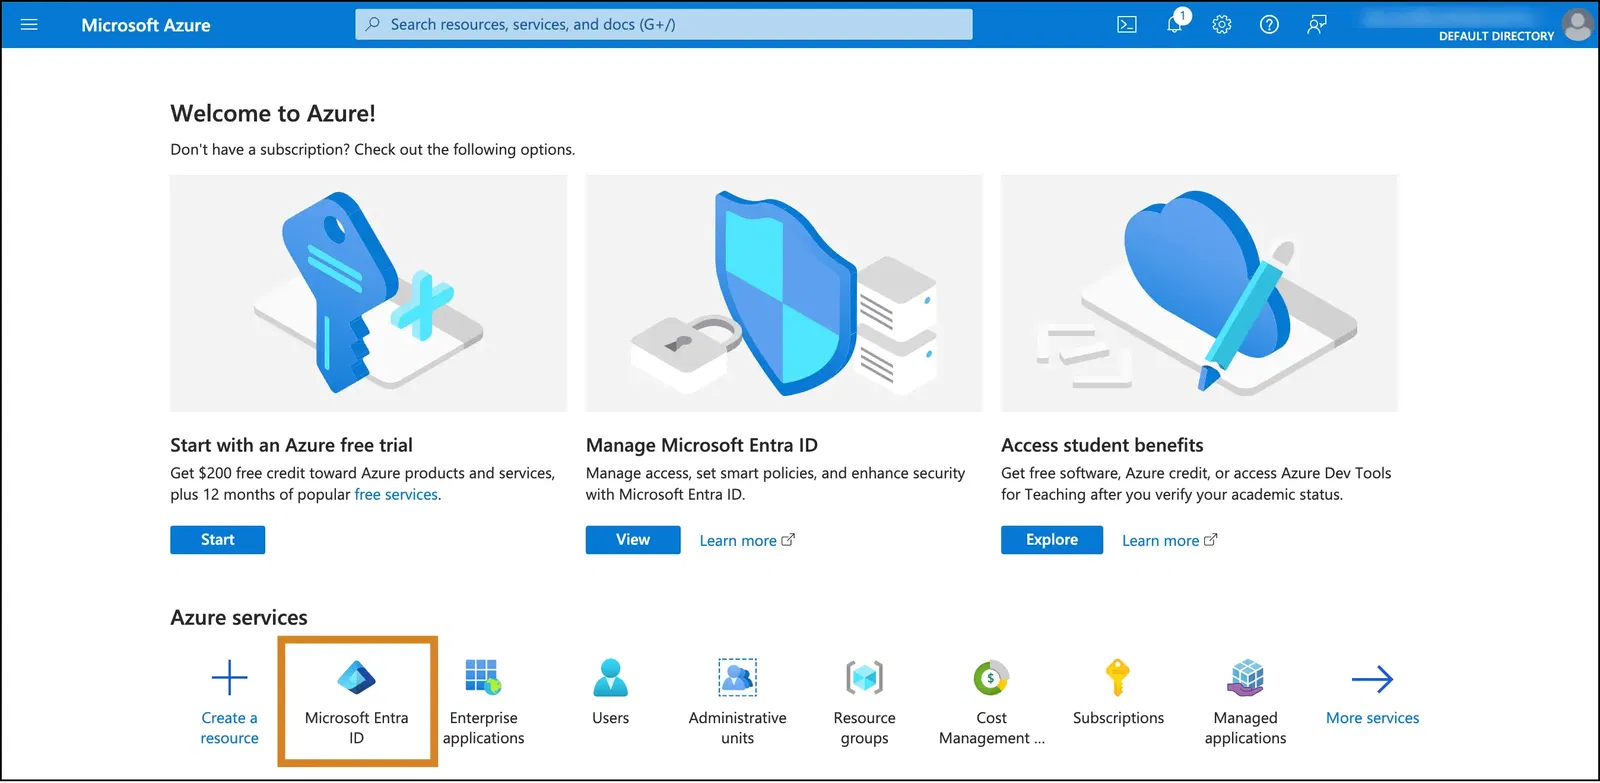
Step 2: Log in to Azure and then select Microsoft Entra ID to open the overview page.
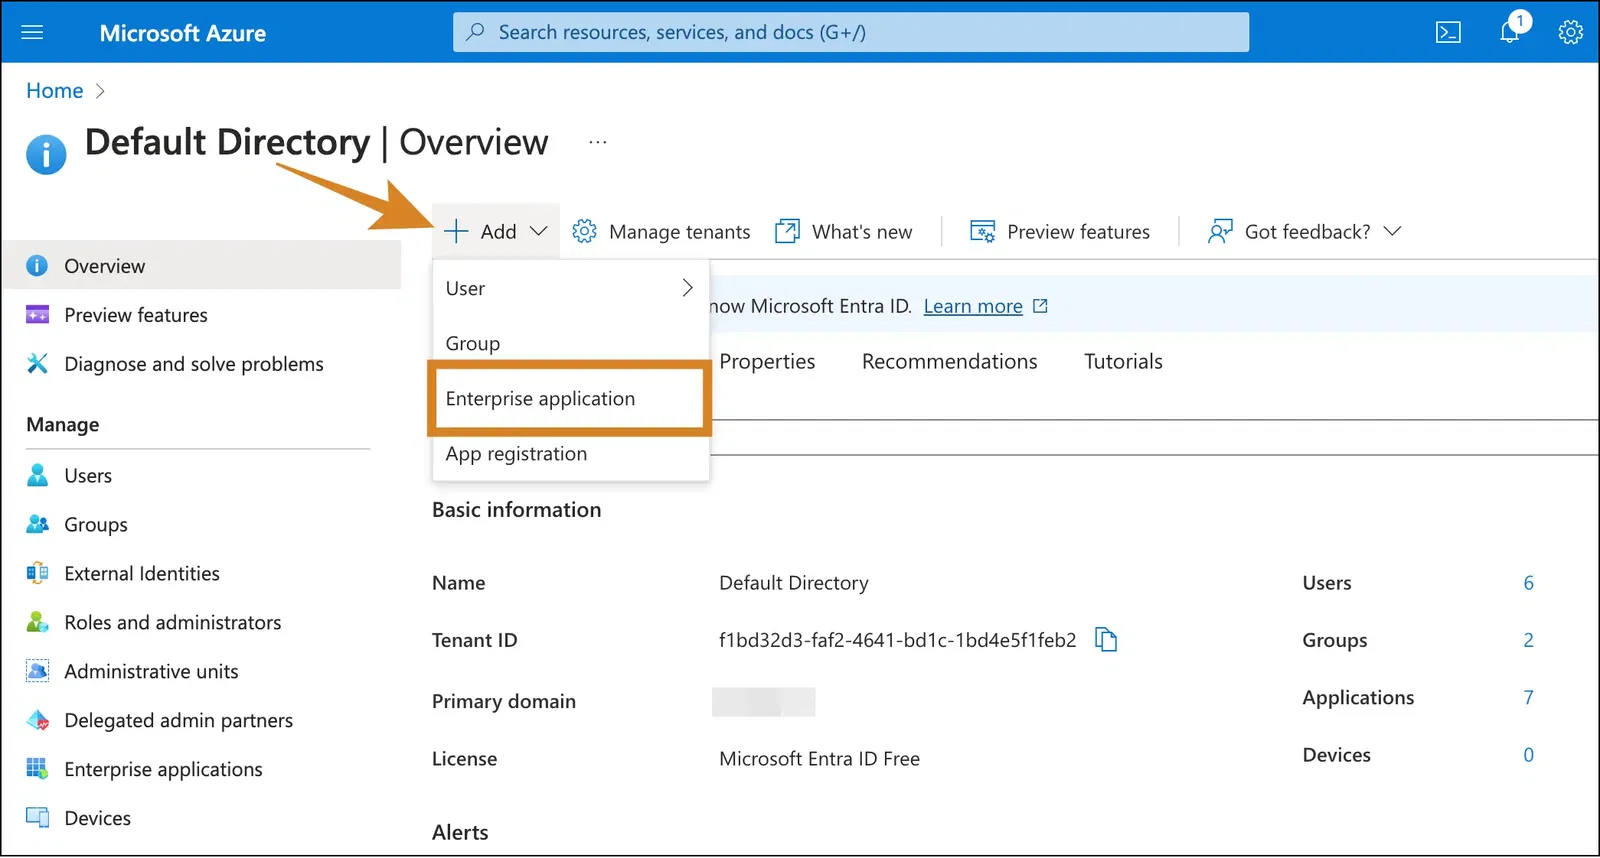
Step 3: Click Add and select Enterprise Application.
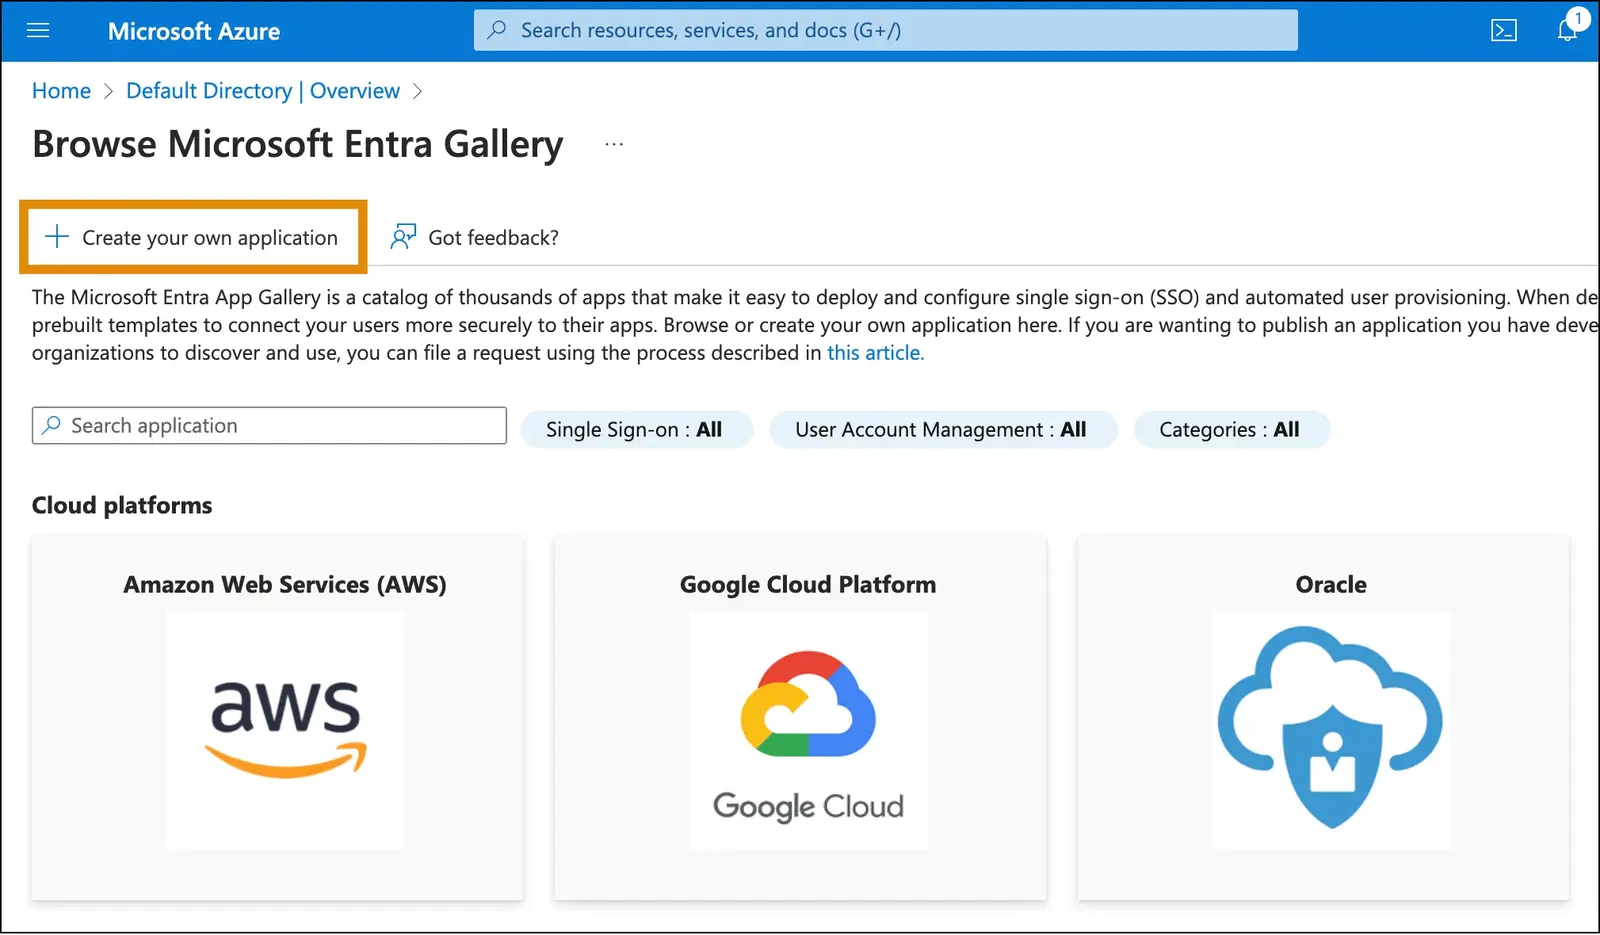
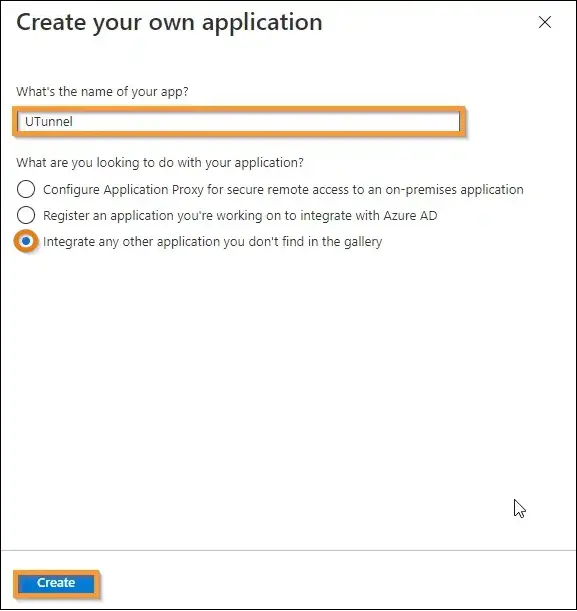
Step 4: Choose Create your own application.
Step 5: Enter your desired app name (here, we are naming UTunnel) and choose Integrate any other application you don’t find in the gallery. Once done, click Create.
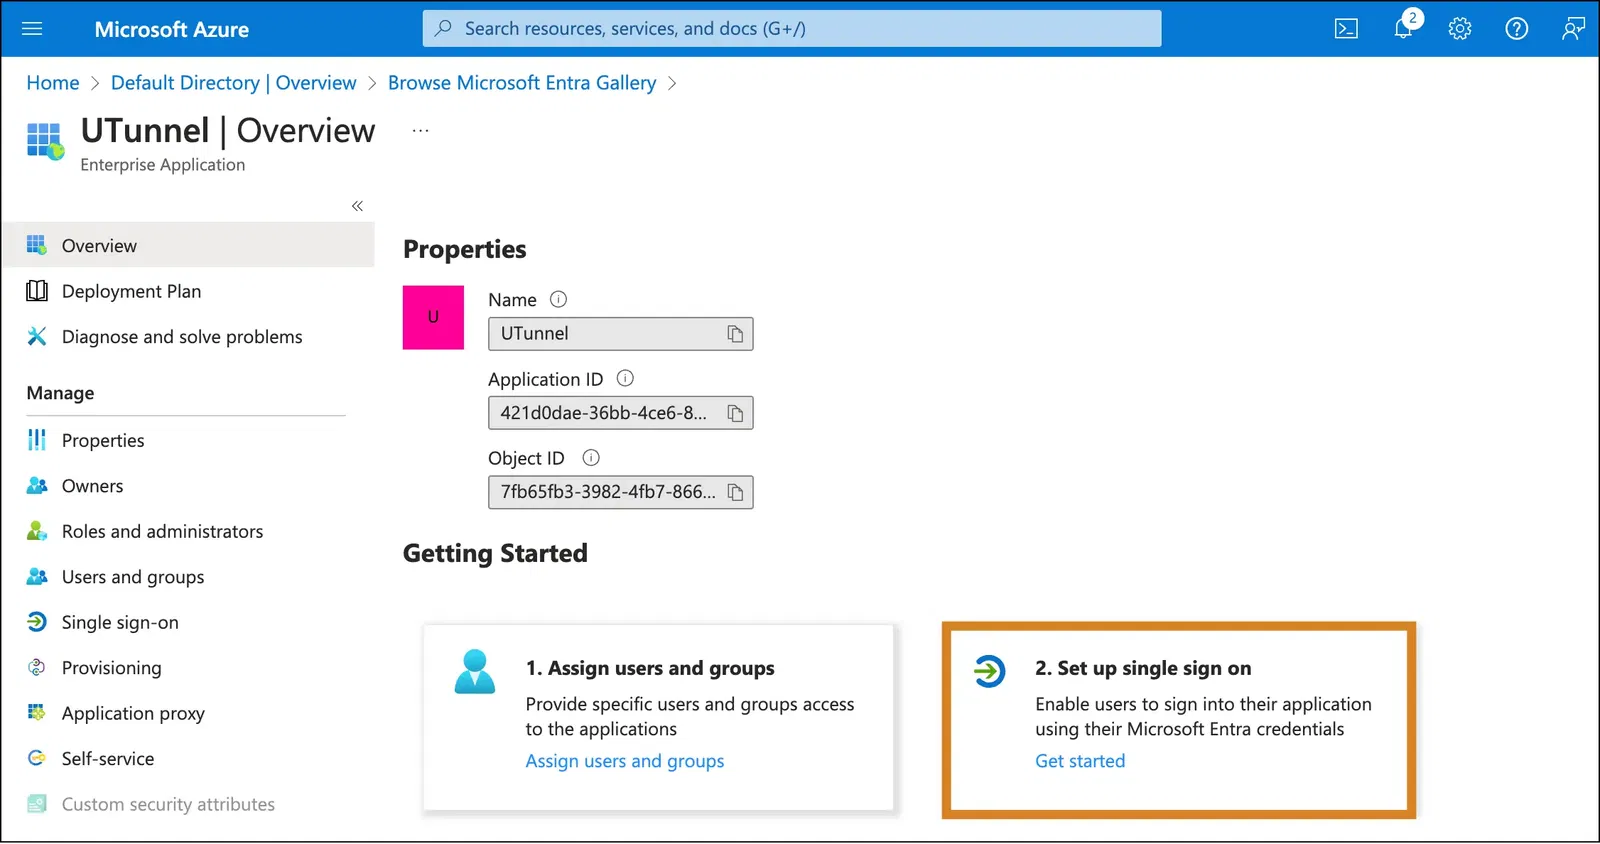
Step 6: Now, you will be taken to the overview of the application you have created. Here, click Set up single sign on.
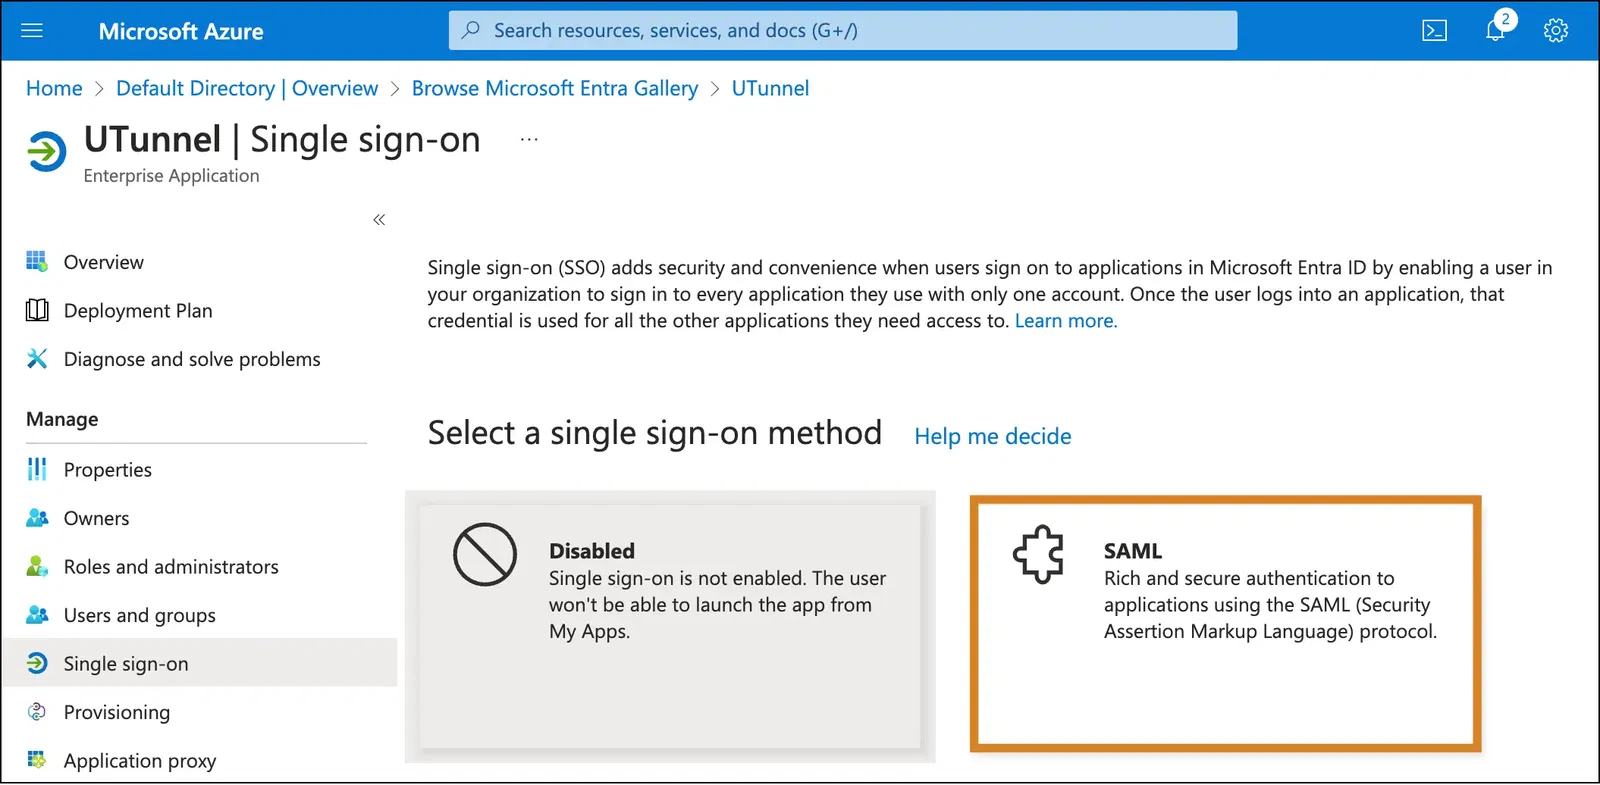
Step 7: Choose SAML.
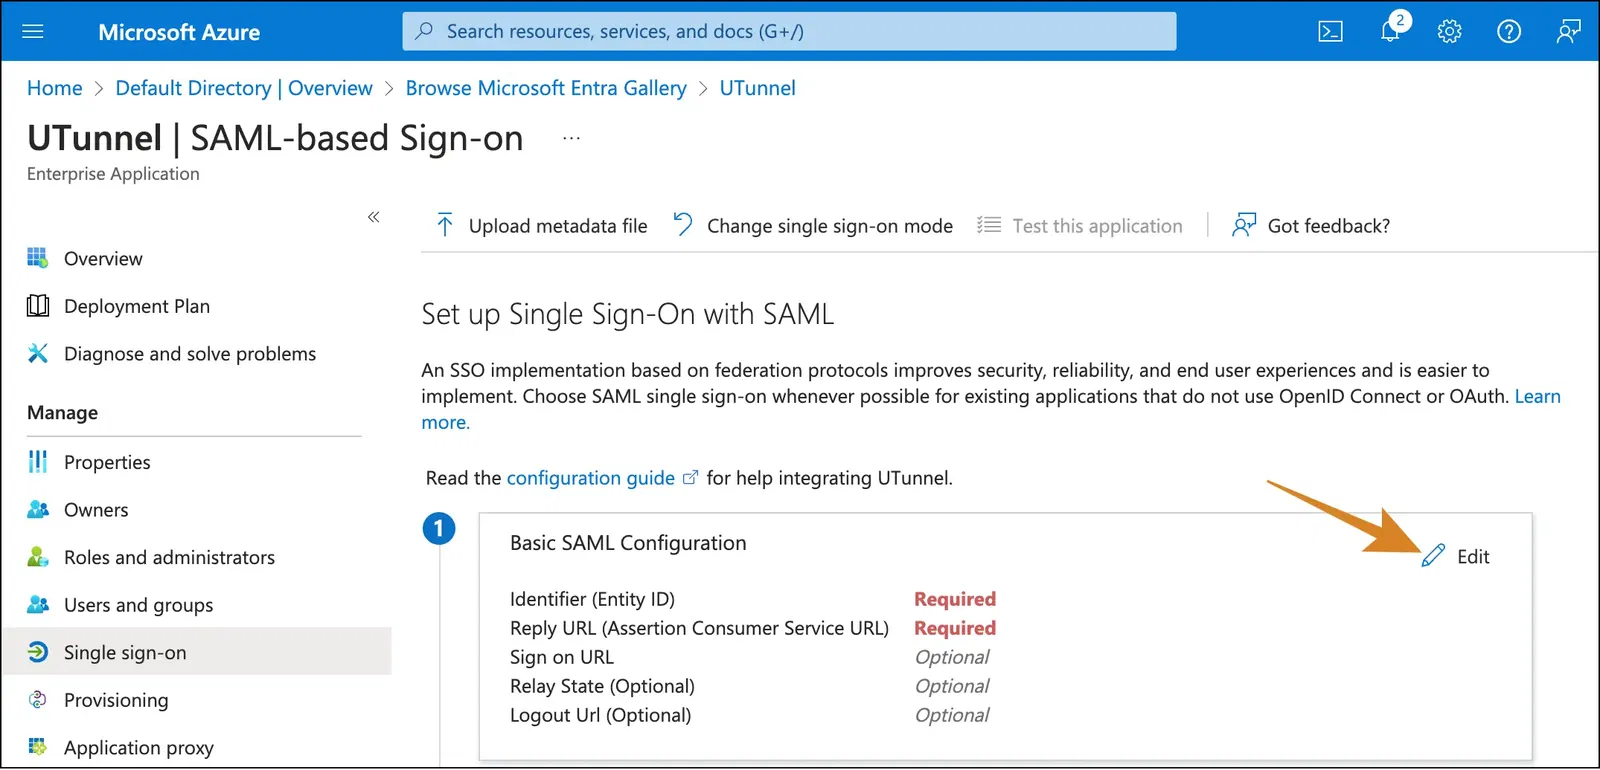
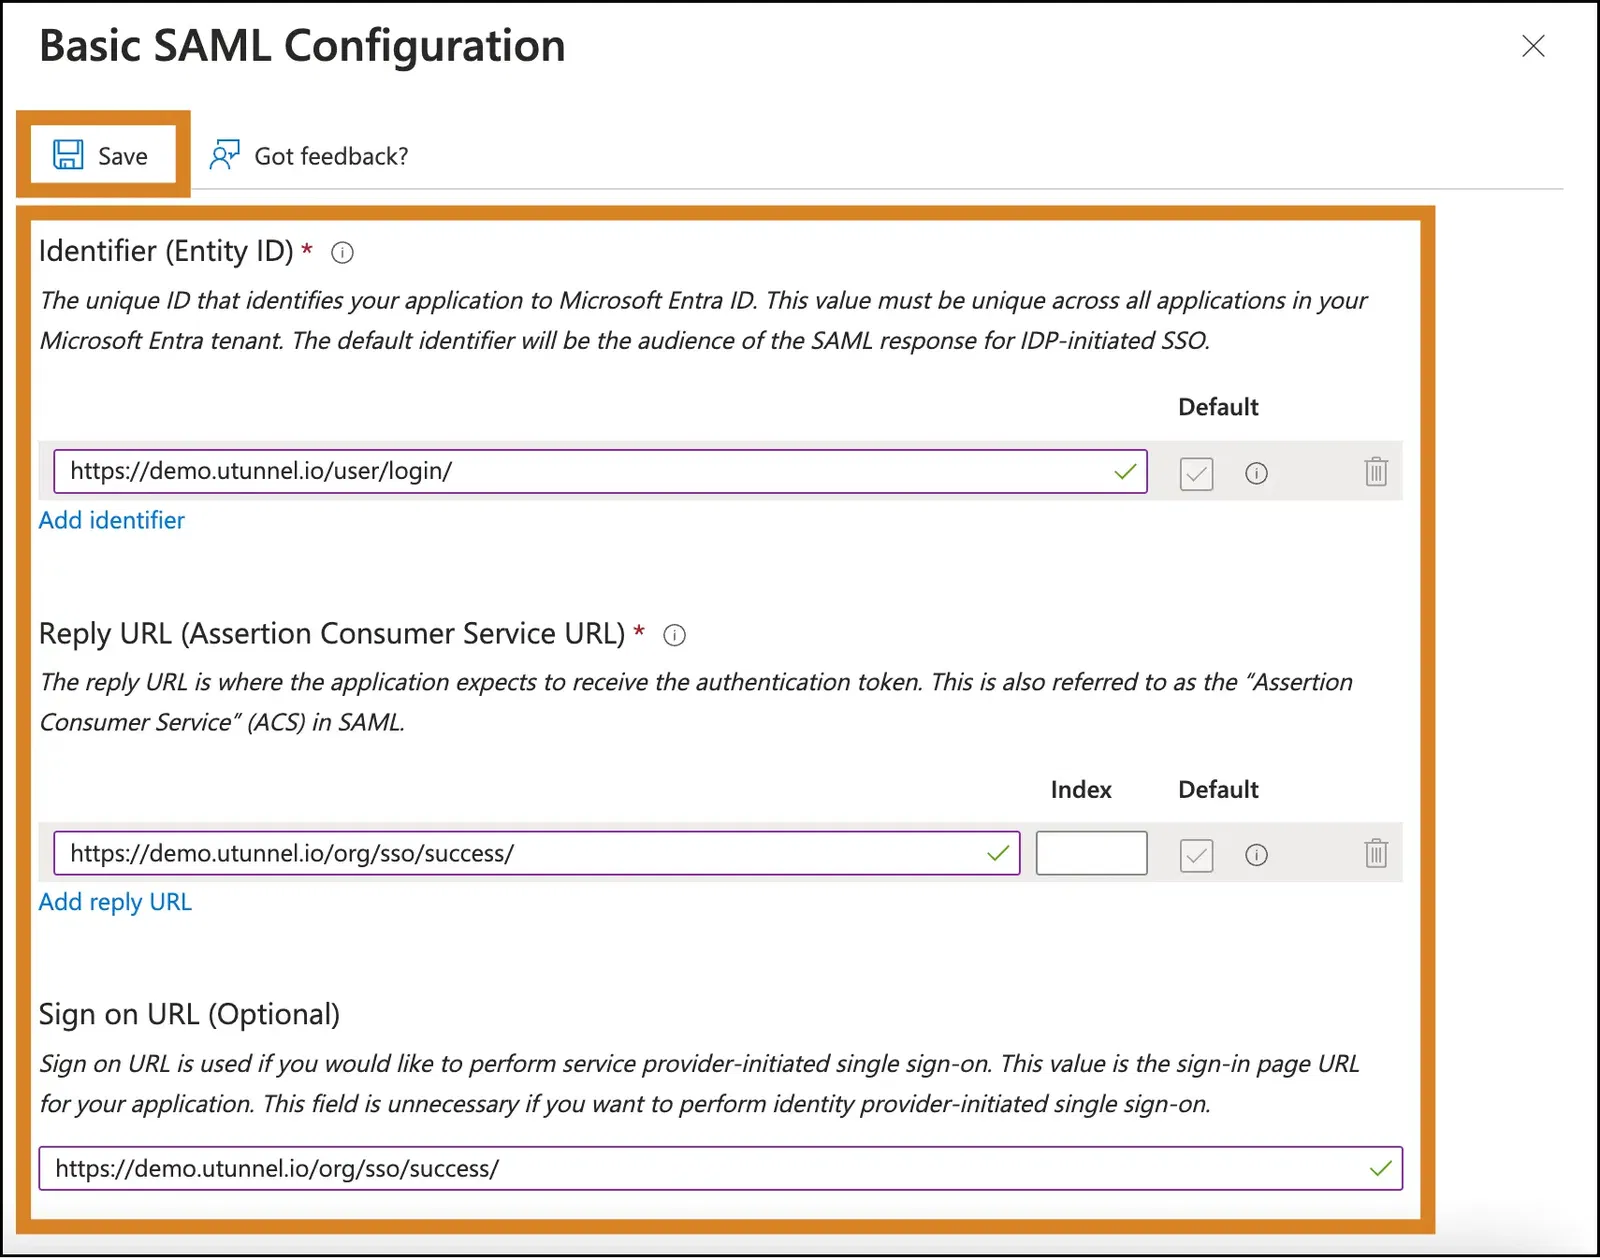
Step 8: Click Edit on the right side of Basic SAML Configuration.
Step 9: Now, it’s time to configure the integration URLs and SAML attributes. You will need the details obtained from the UTunnel Azure SSO page (Step 2) here:
Once you add all the necessary information, click Save at the top left.
Step 10: Next, click Edit next to Attributes & Claims.
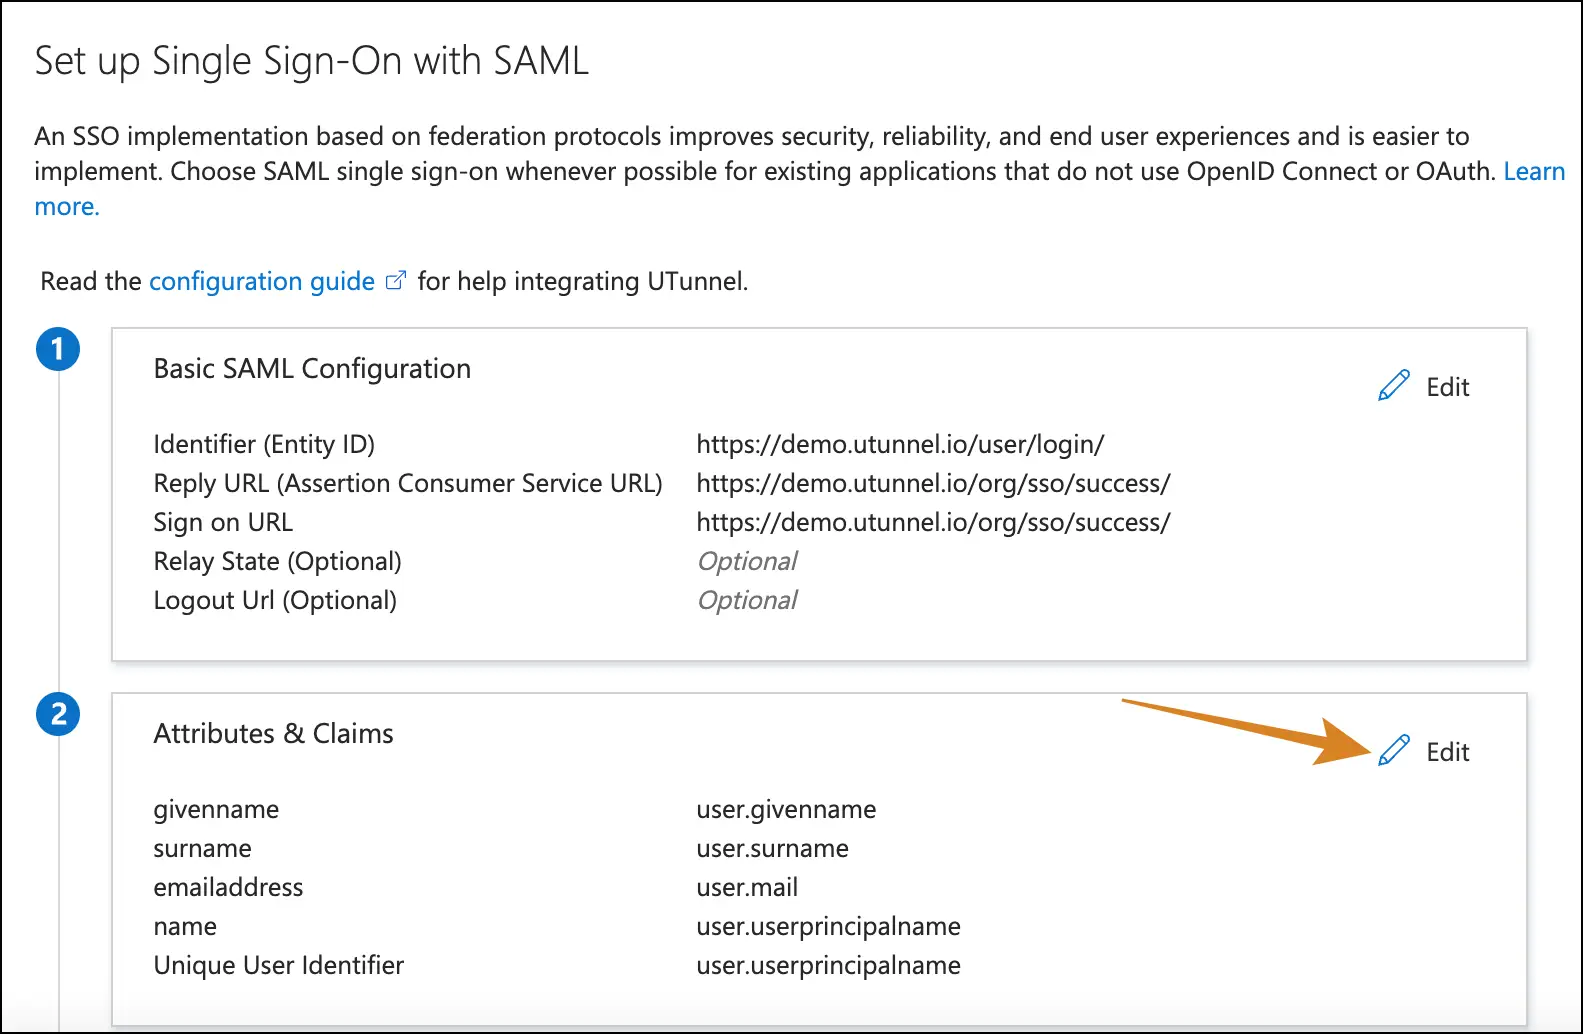
Step 11: Click each Claim name to manage the claims.
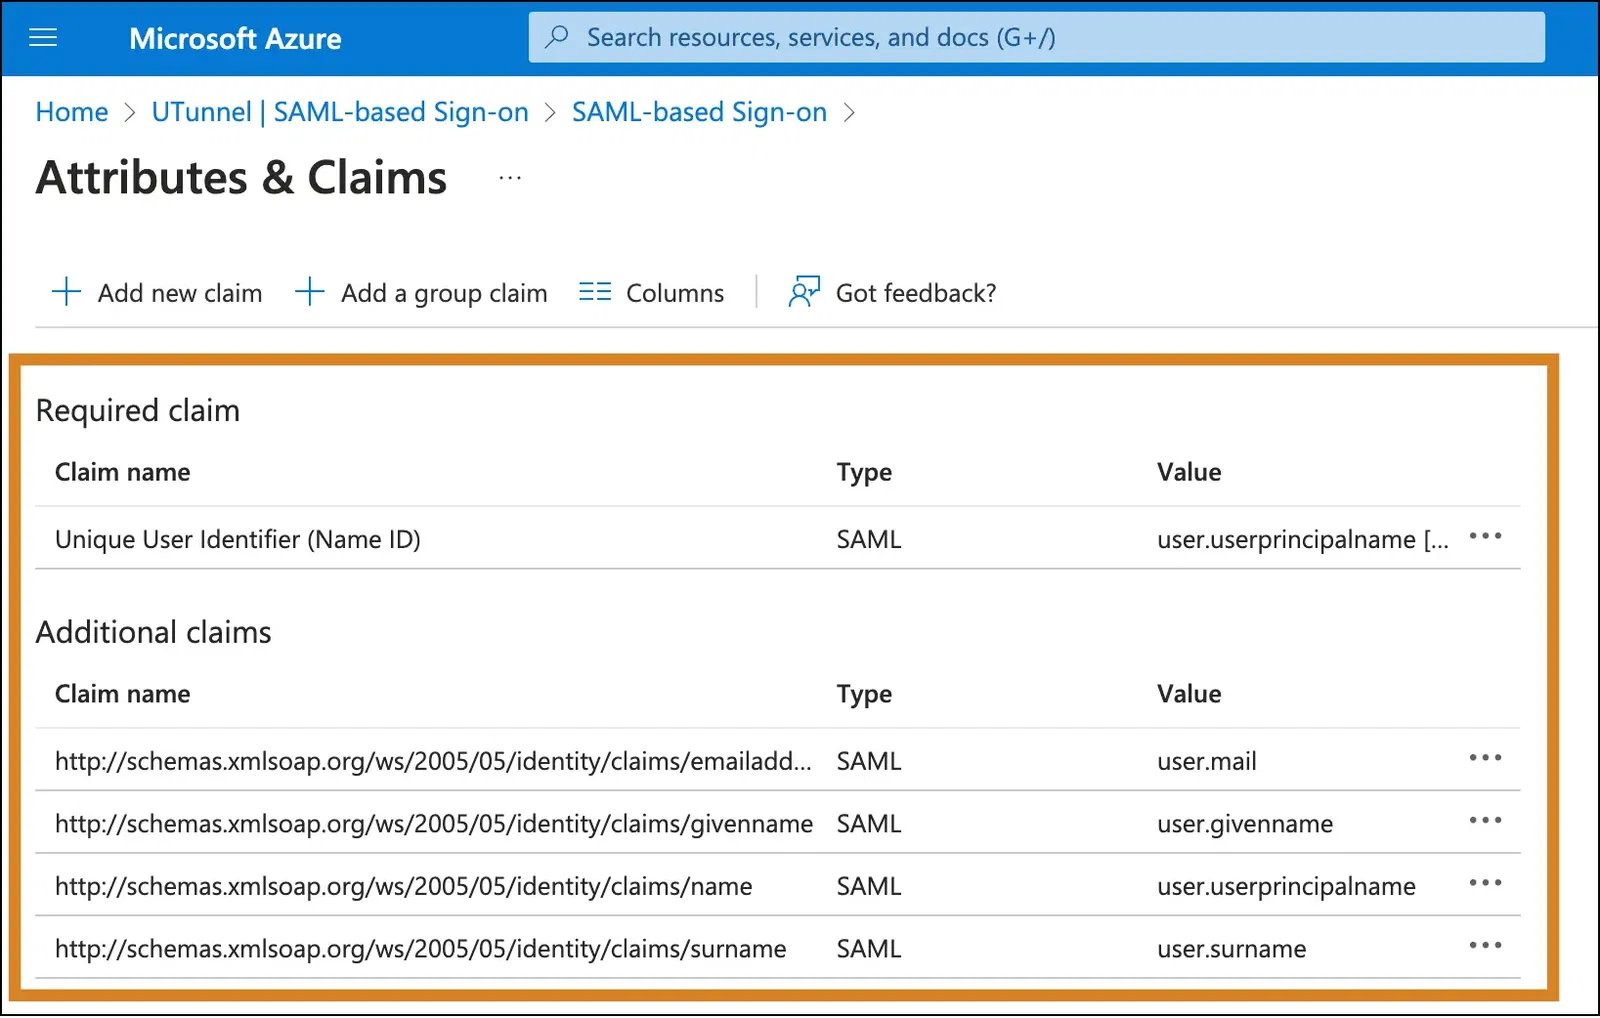
Step 12: Now, enter the following details:
Once done, click Save at the top left.
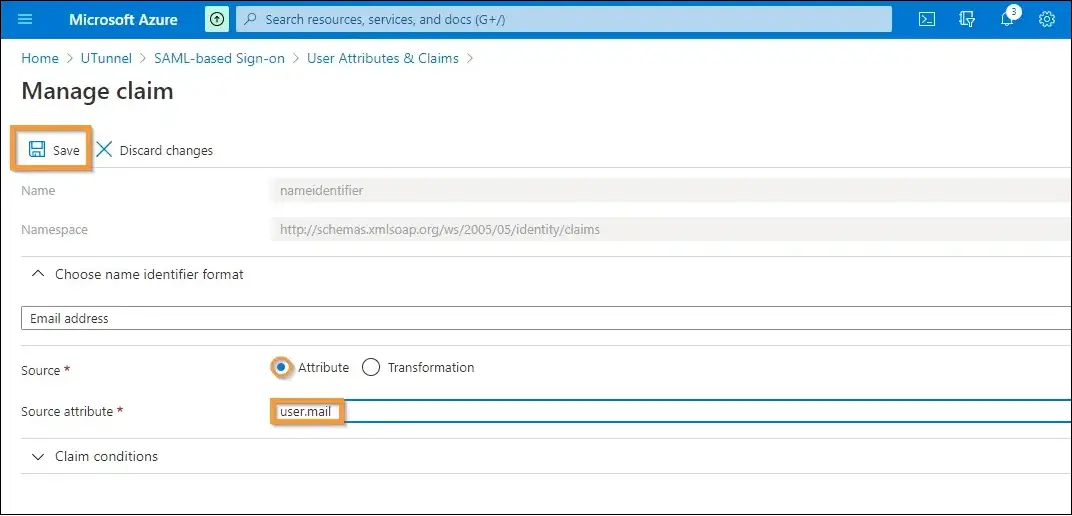
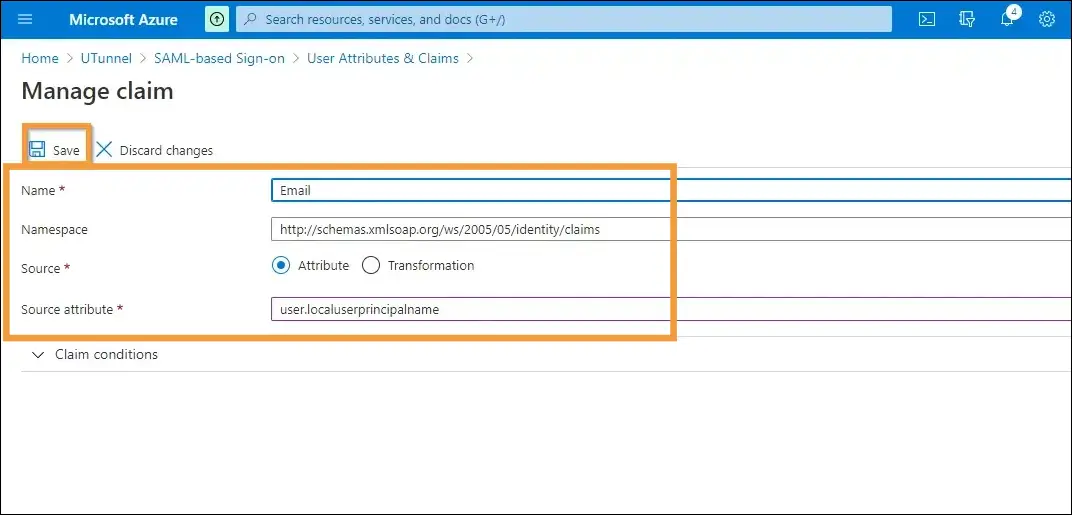
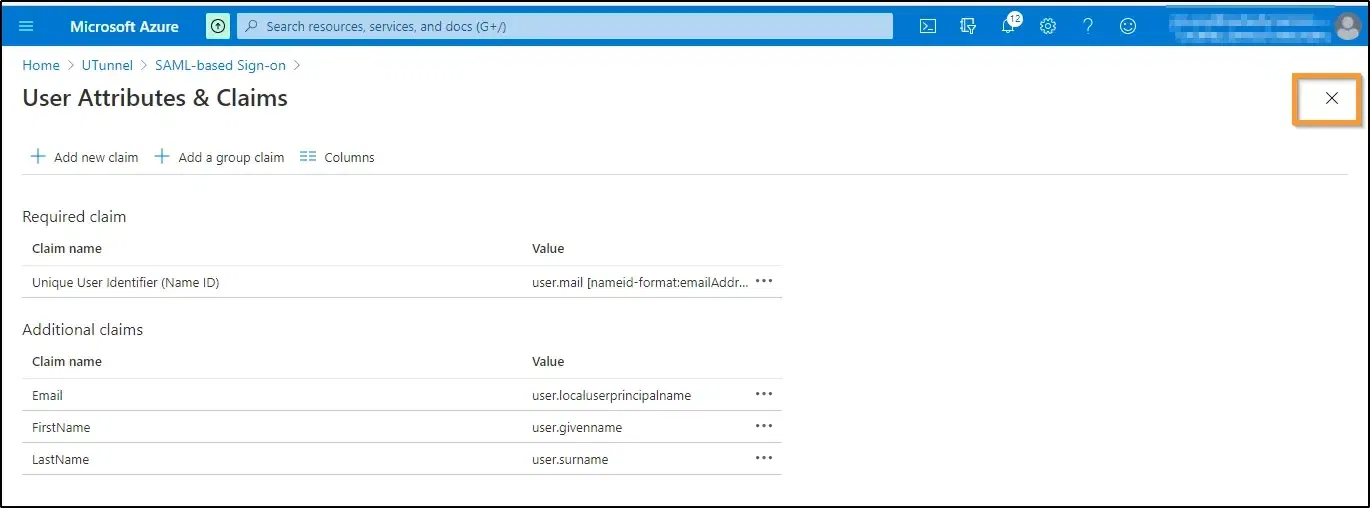
Step 13: Now navigate back to Attributes & Claims, then click on the first additional claim. You will be redirected to the Manage Claim screen. Edit the first claims as given below:
Once done, click Save.
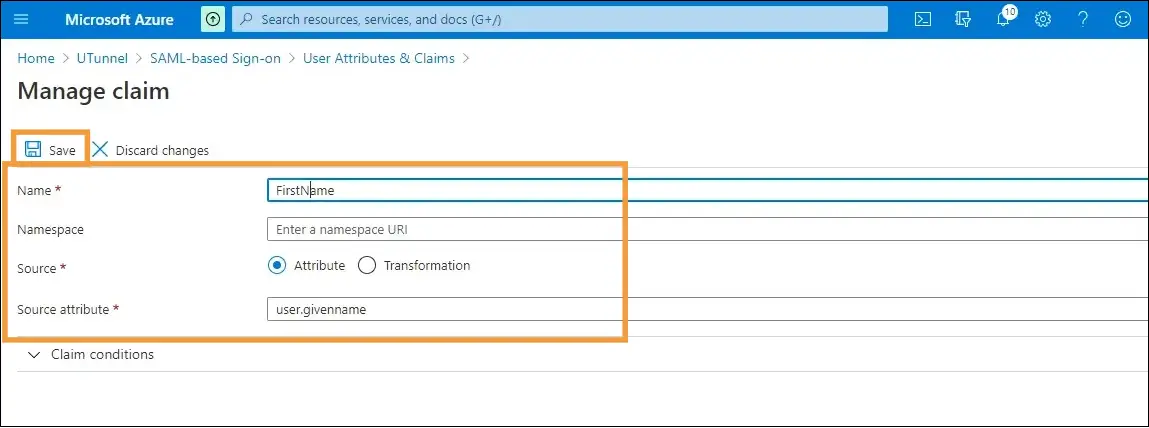
Step 14: Click on the second additional claim. You will be redirected to the Manage Claim screen. Edit the second claim as given below:
After adding the information, click Save.
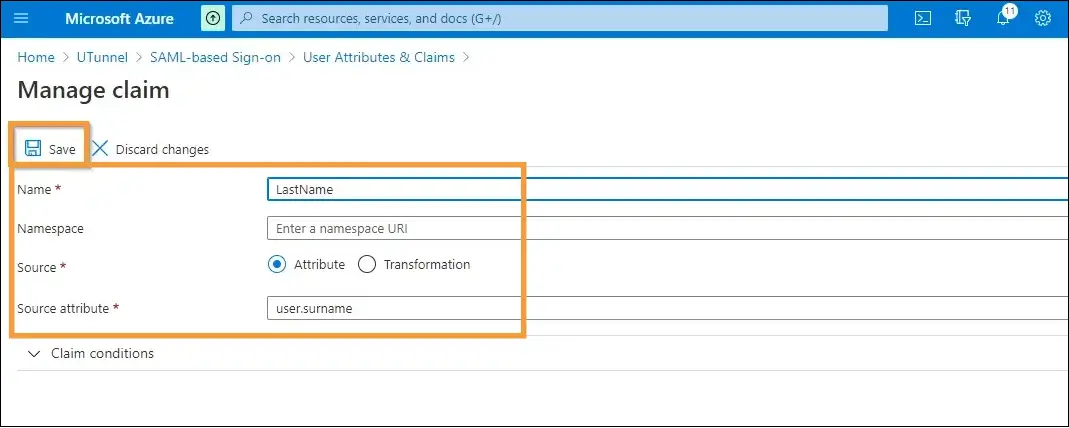
Step 15: Click the third additional claim, and when you are redirected to the Manage Claim screen, edit them as follows:
Click Save to complete the step.
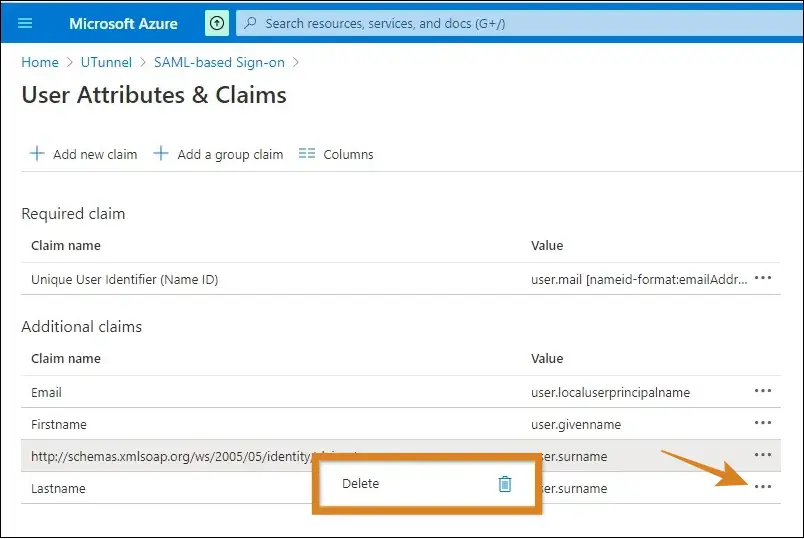
Step 16: Now right-click on the fourth additional attribute and click the Delete icon to remove it. Click OK to confirm.
Step 17: Next, click the Close icon at the top right.
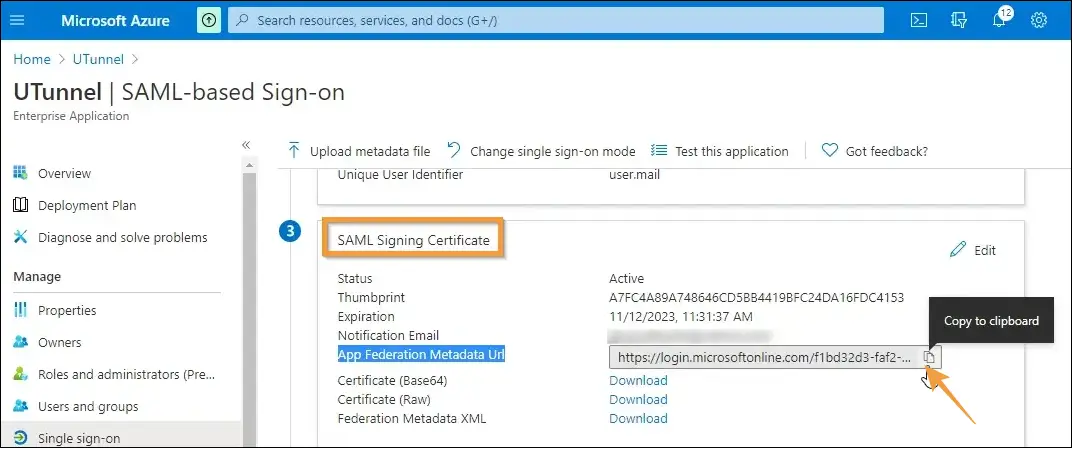
Step 18: Scroll down to the SAML Signing Certificate section and copy the App Federation Metadata URL.
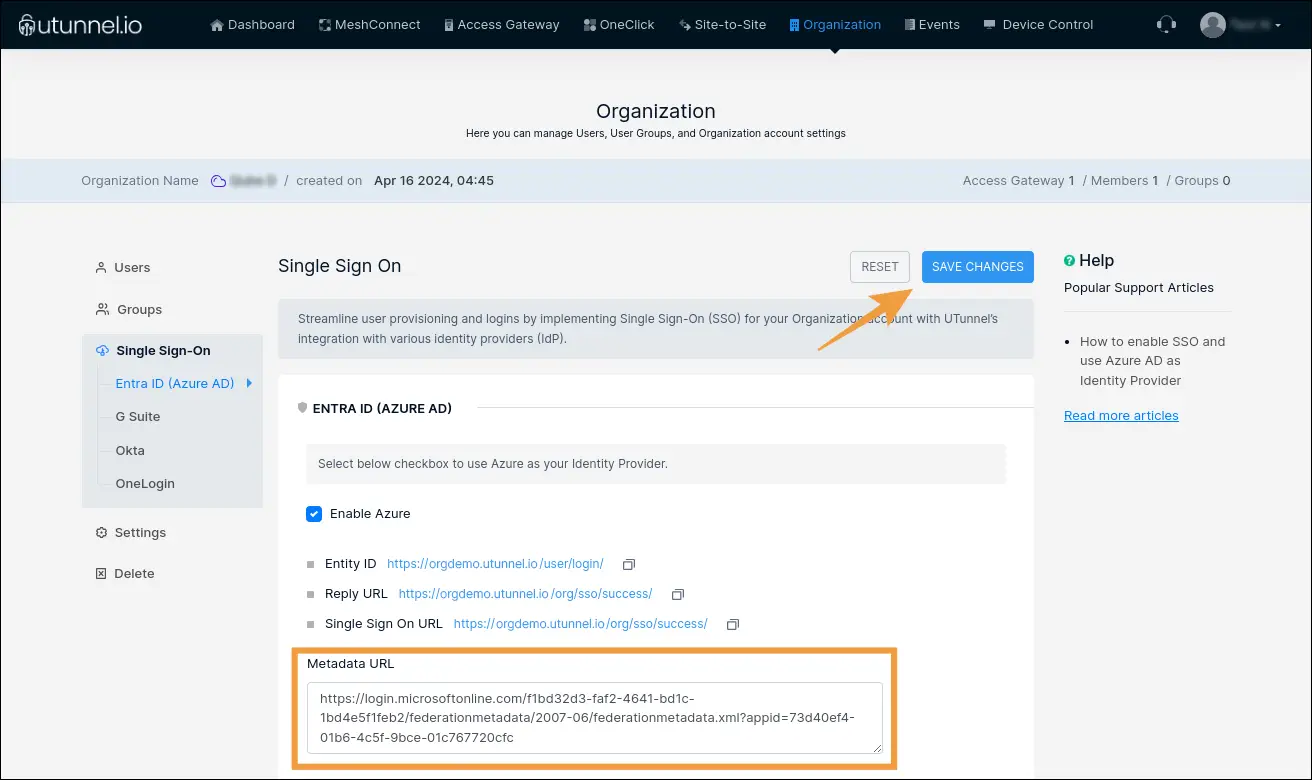
Step 19: Now, navigate back to the UTunnel web dashboard and go to the Azure SSO page that you have kept open. Paste the copied URL inside the dialogue box of Metadata URL field. Click Save Changes to confirm everything.
You have successfully set up SSO in your UTunnel organization with Azure. Users with active Azure login and necessary privileges will be able to log in to your organization’s UTunnel dashboard. However, the organization owner must log in with the registered email and password, not the Azure account.
Once you have enabled SSO on your UTunnel account with Entra ID (Azure AD), you can enable SCIM for the same account to completely automate user additions and removals on your Organization account.
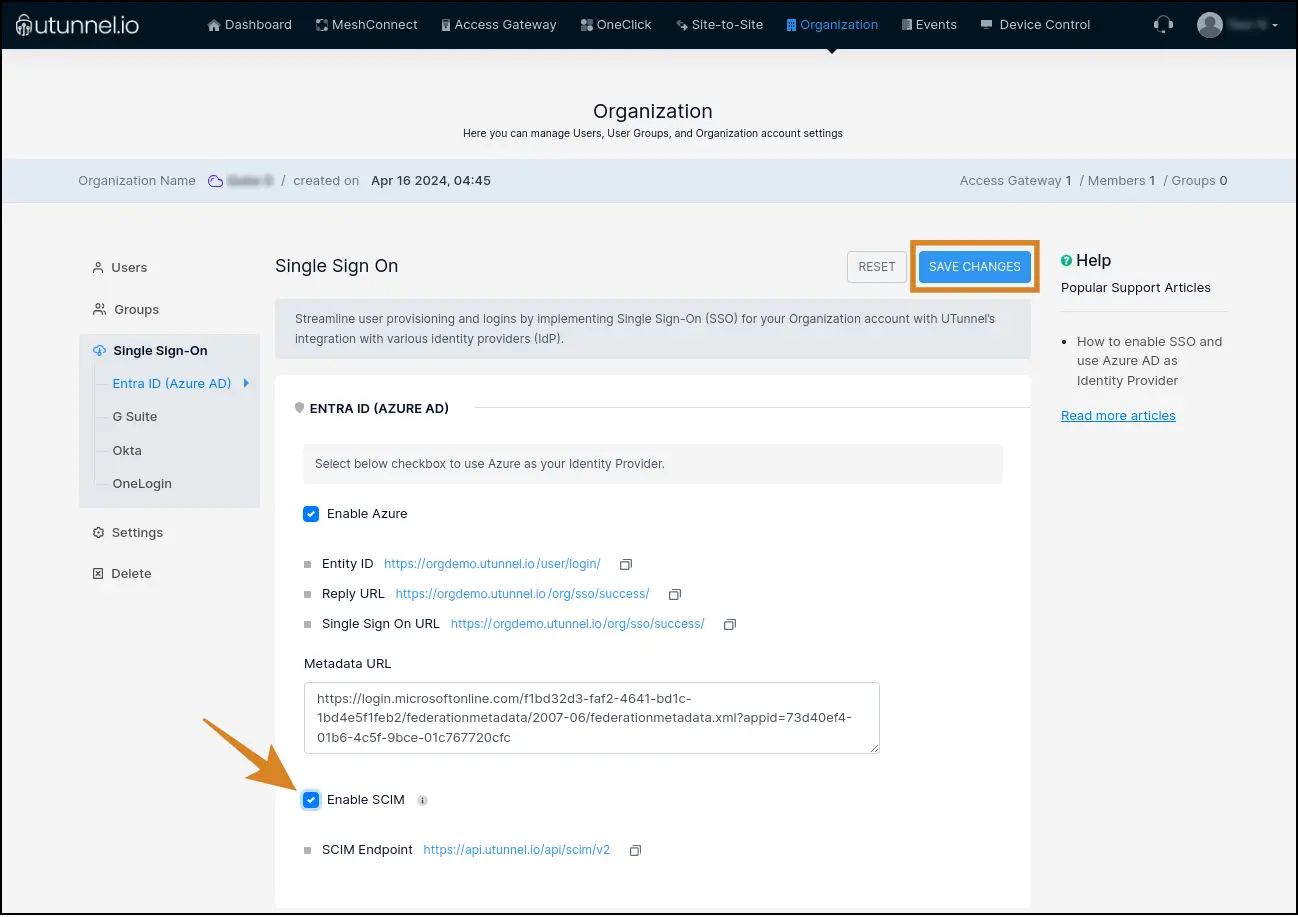
Step 1: Open UTunnel and navigate to Organization > Single Sign On > Entra ID (Azure AD). Click the checkbox next to Enable SCIM and click Save Changes.
Note: If Enable SCIM grayed out, make sure you have connected UTunnel with Entra ID (Azure AD) SSO.
Step 2: A pop-up window will appear, displaying the SCIM token.
Keep this page handy, as the details will be required in the proceeding steps.

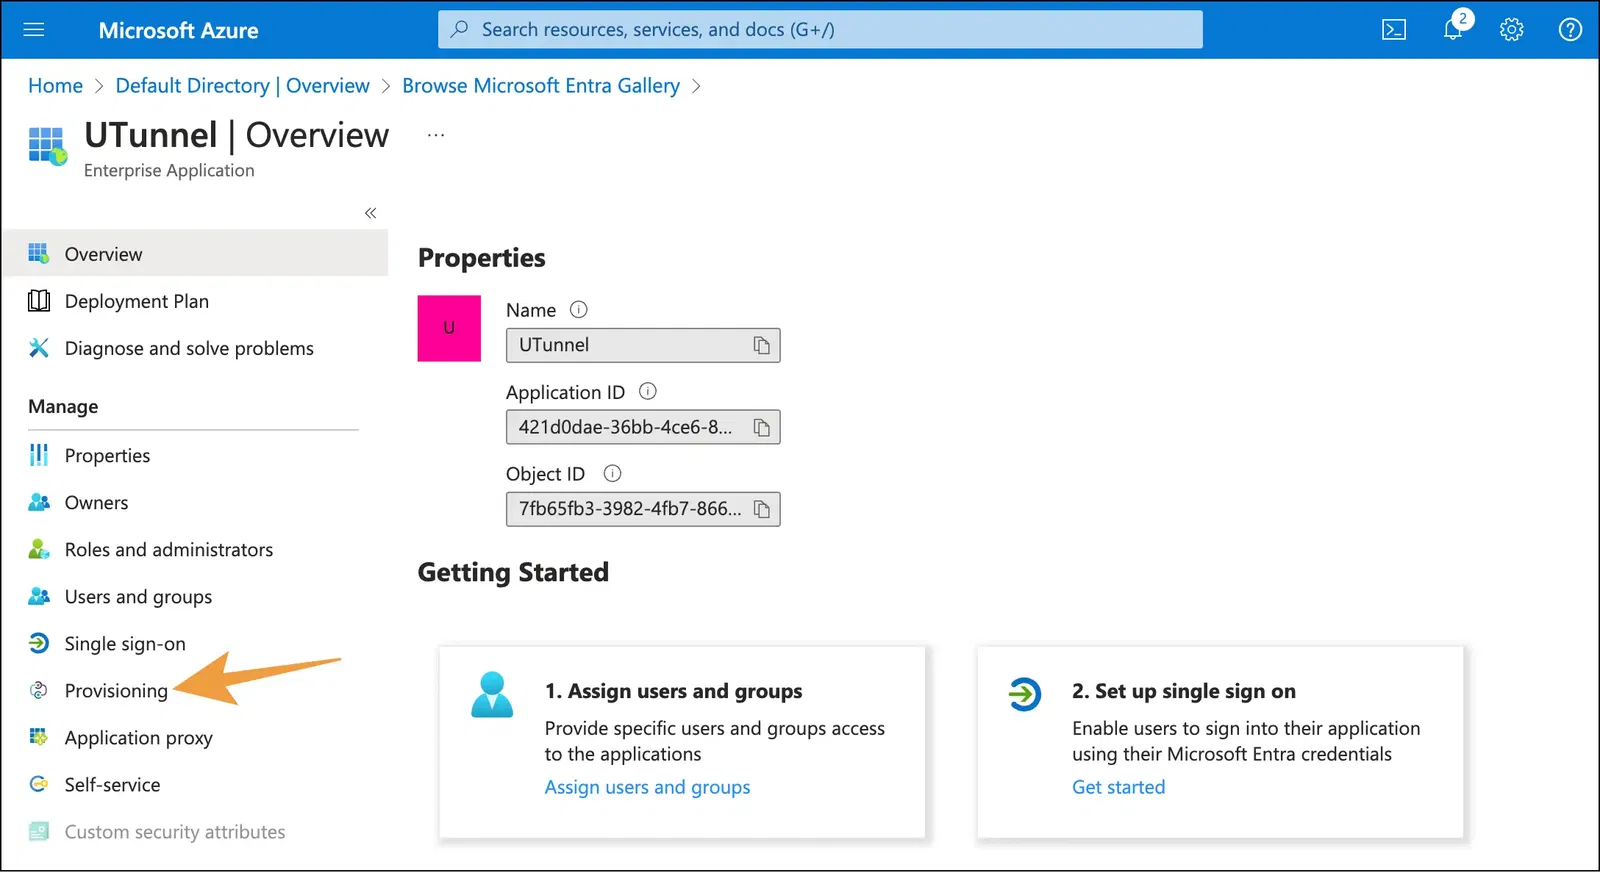
Step 3: Now, open a new tab and log in to Azure. From here, select the app for which you want to enable SCIM and then choose Provisioning.
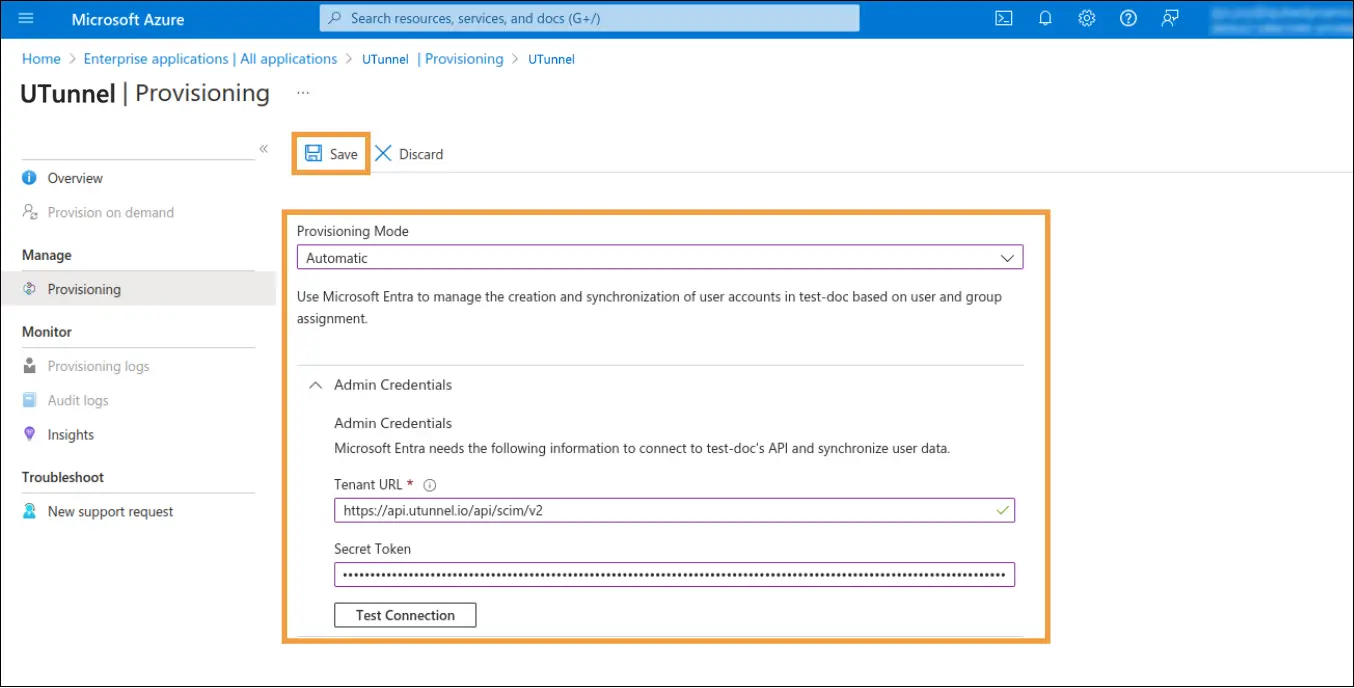
Step 4: Next, click Provisioning again under Manage.

Step 5: Now fill in the following with the information provided here:
Once you add all the information, click Test Connection and then hit Save.
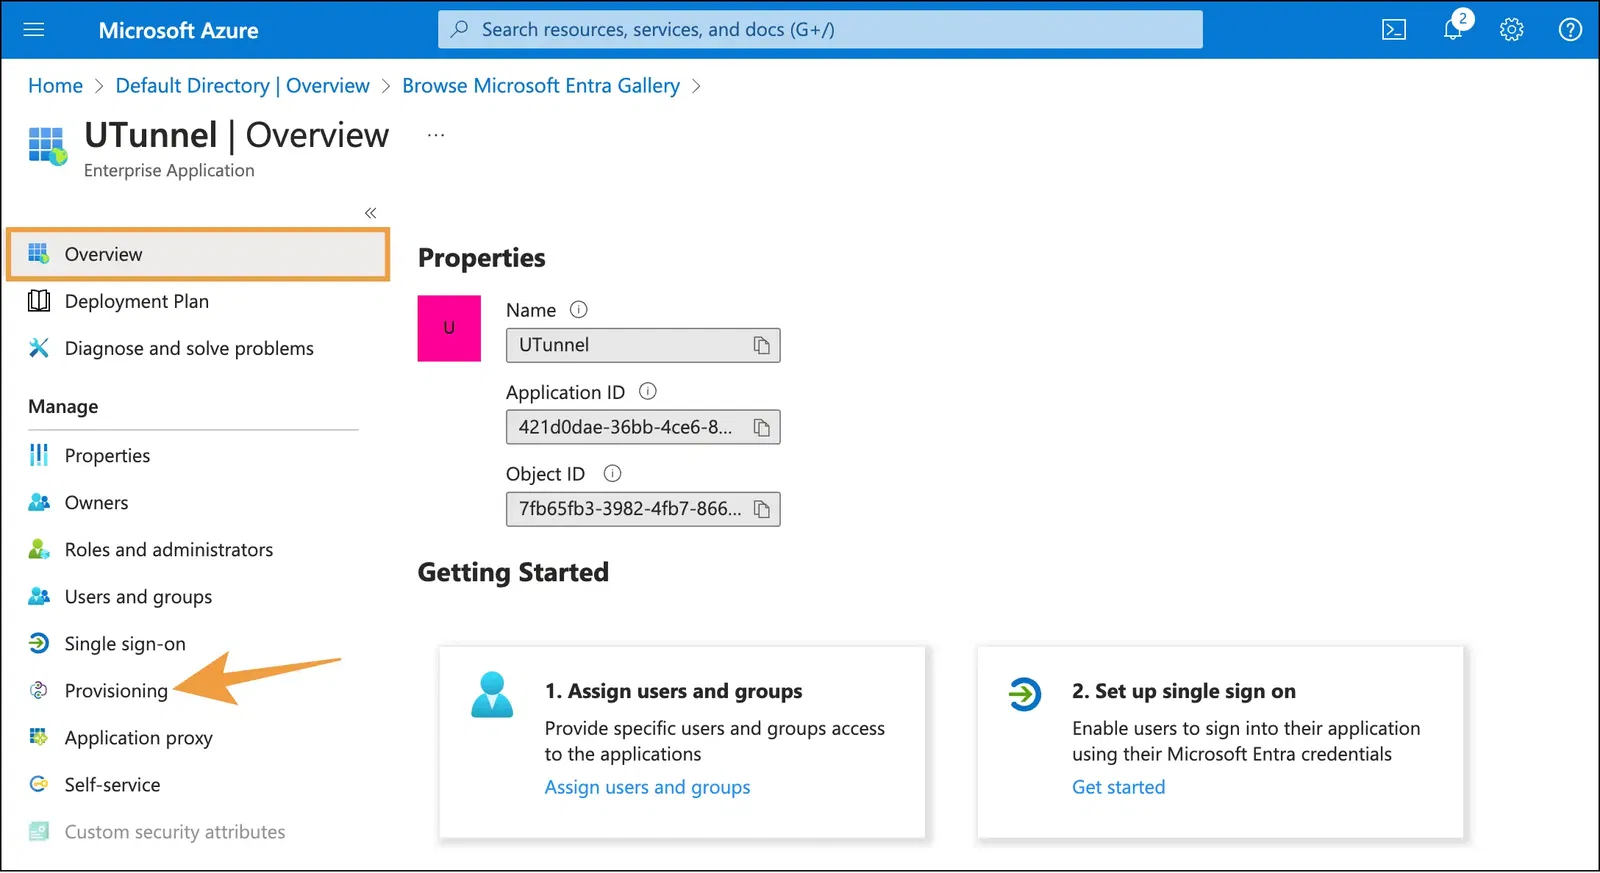
Step 6: Return to the Overview page of the app and then choose Provisioning from the sidebar.
Step 7: Click Start Provisioning.

That's it. You have now successfully completed SSO and SCIM configuration in your UTunnel account with Entra ID (Azure AD).