Updated on 27 Jun, 2023
This guide helps in creating a Site-to-Site connection between the UTunnel server and the Mikrotik router.
We need admin login credentials for the UTunnel dashboard and Mikrotik router.
1. Login to the UTunnel dashboard. Then navigate to Site-to-Site tab and click on Create Tunnel button. Select the option TUNNEL WITH NON UTUNNEL SERVER as seen below.
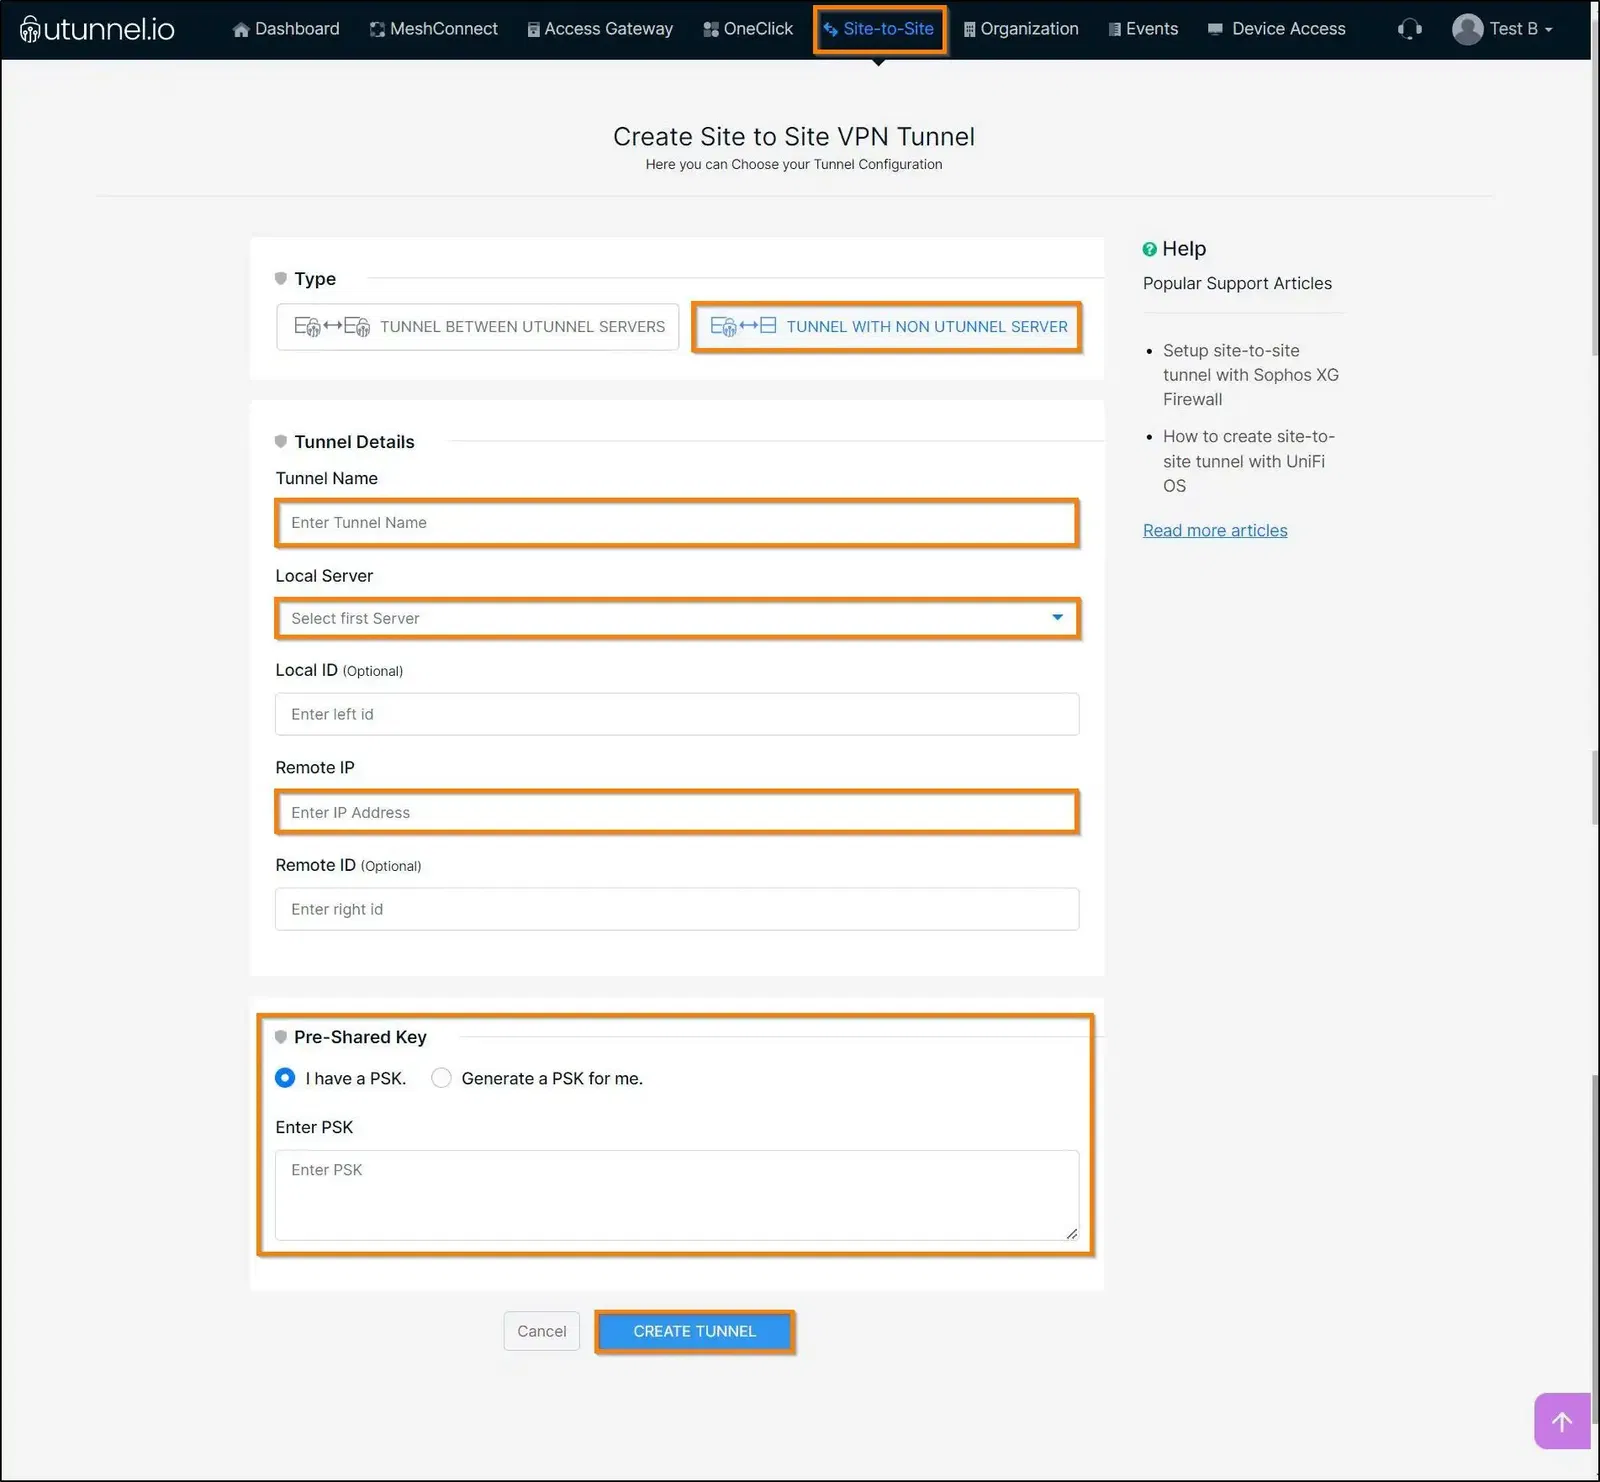
Tunnel Name: Your desired name for the tunnel
Local Server: Select the UTunnel server from the dropdown menu
Remote IP: Enter the IP of Mikrotik router
Pre-Shared Key: You can use your own or generate a pre-shared key.
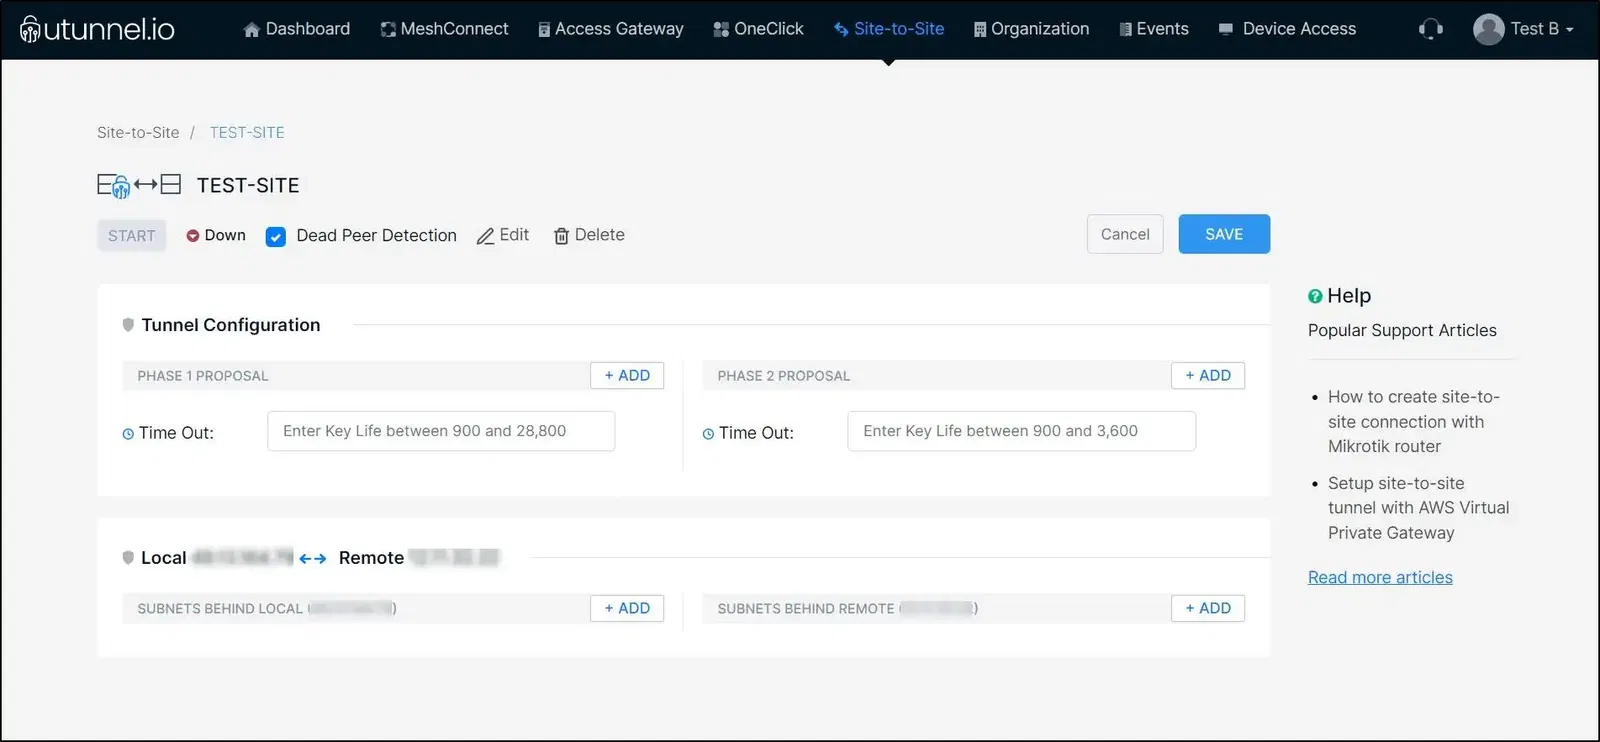
2. Next we need to add the Subnets. Subnets behind Local are the subnets behind the UTunnel server. Subnets behind Remote are the subnets behind Mikrotik router.
3. Now login to Mikrotik router. We need to create a Profile, Peer, Proposal, Policies, and Identities in Mikrotik router to create Site-to-Site tunnel. For that, navigate to IP > IPSec > Profile and click on add new.

Name: Your desired name for the profile
Hash Algorithm: sha256
PRF Algorithm: sha256
Encryption Algorithm: aes-256
DH Group: modp2048
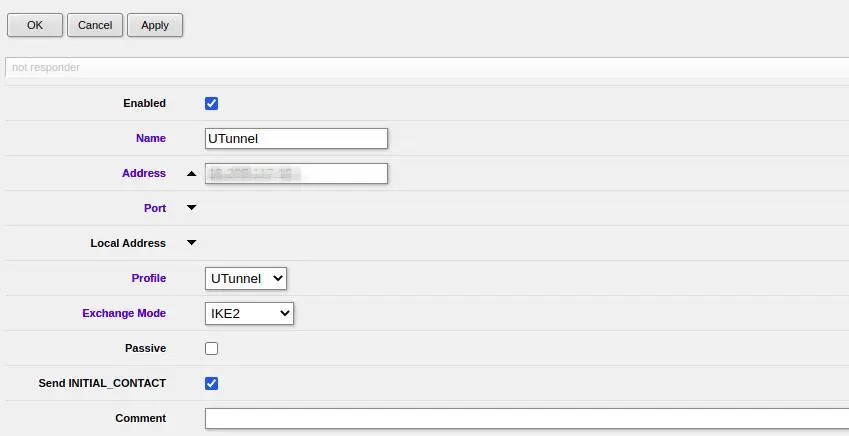
Name: Give a desired name
Address: IP address of UTunnel server
Profile: Select the profile that you have created from the dropdown menu
Exchange Mode: IKE2
Click apply and ok to save
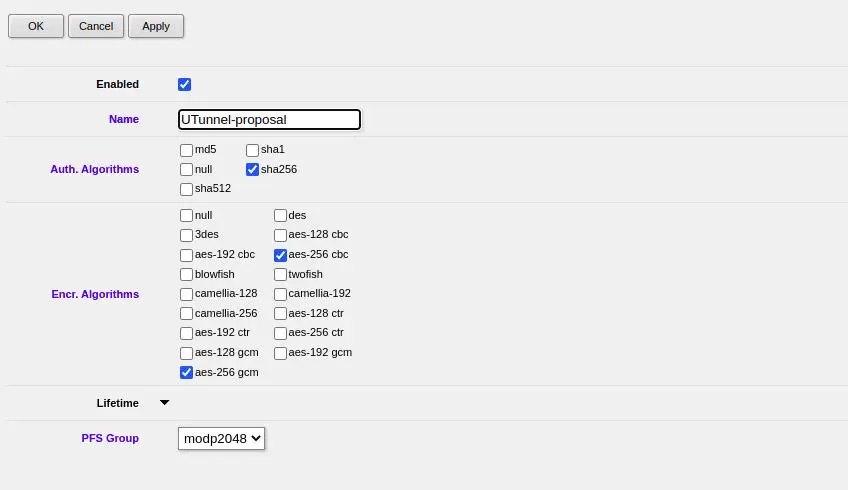
Name: Give a desired name
Auth Algorithms: sha256
Encr. Algorithms: aes-256 cbc, aes-256 gcm
PFS Group: modp2048
Click apply and ok to save
6. Next navigate to IP > IPSec > Policies
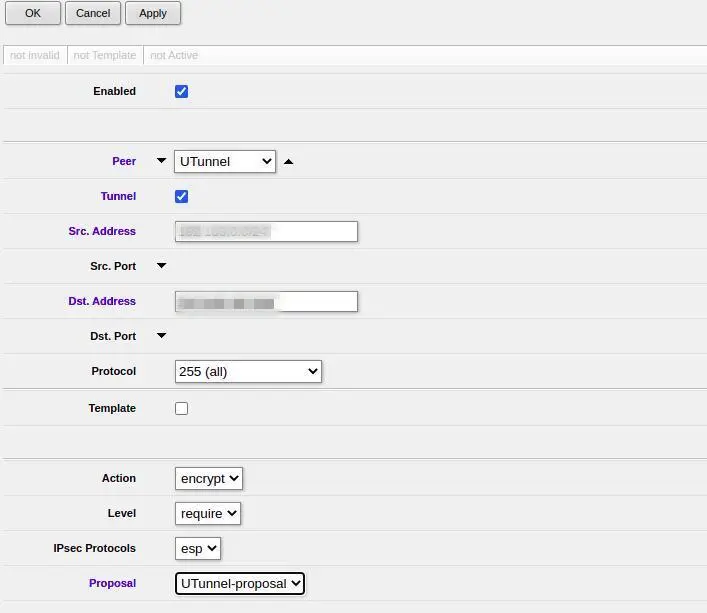
Peer: Select peer created from the dropdown menu
Src. Address: The local subnet behind Mikrotik router
Dst. Address: The remote subnet behind UTunnel server
Action: encrypt
Level: require
IPsec Protocols: esp
Proposal: Select the created proposal from the dropdown
Click apply and ok to save
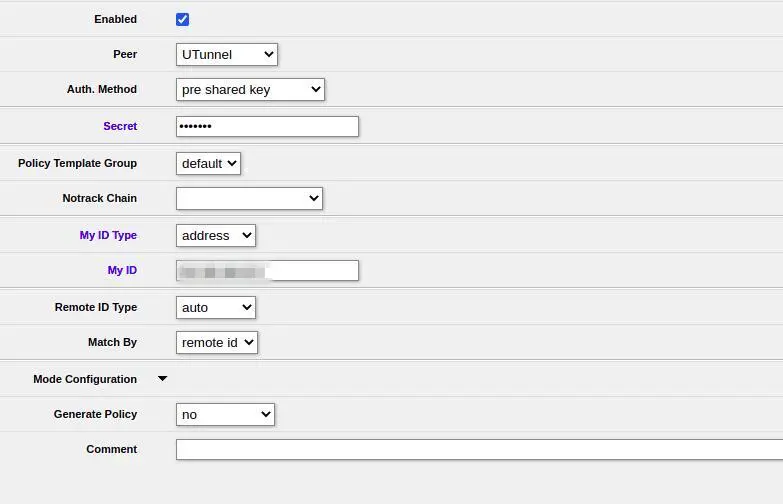
Peer: Select the Peer that you created from the dropdown menu
Auth. Method: Select pre-share key from the dropdown menu
Secret: Enter the Pre-Shared key created via the UTunnel dashboard in Step 1
My ID Type: Select the address from the dropdown menu
My ID: Key in Mikrotik IP address
Remote ID Type: Select auto from the dropdown menu
Match by: Select remote-id from the dropdown menu
Click apply and ok to save
Now login back to the UTunnel dashboard and click the START button to start the tunnel