Updated on 10 Aug, 2023
This guide will help you to enable Single-Sign-On and configure Okta as the identity provider for your UTunnel Organization account.
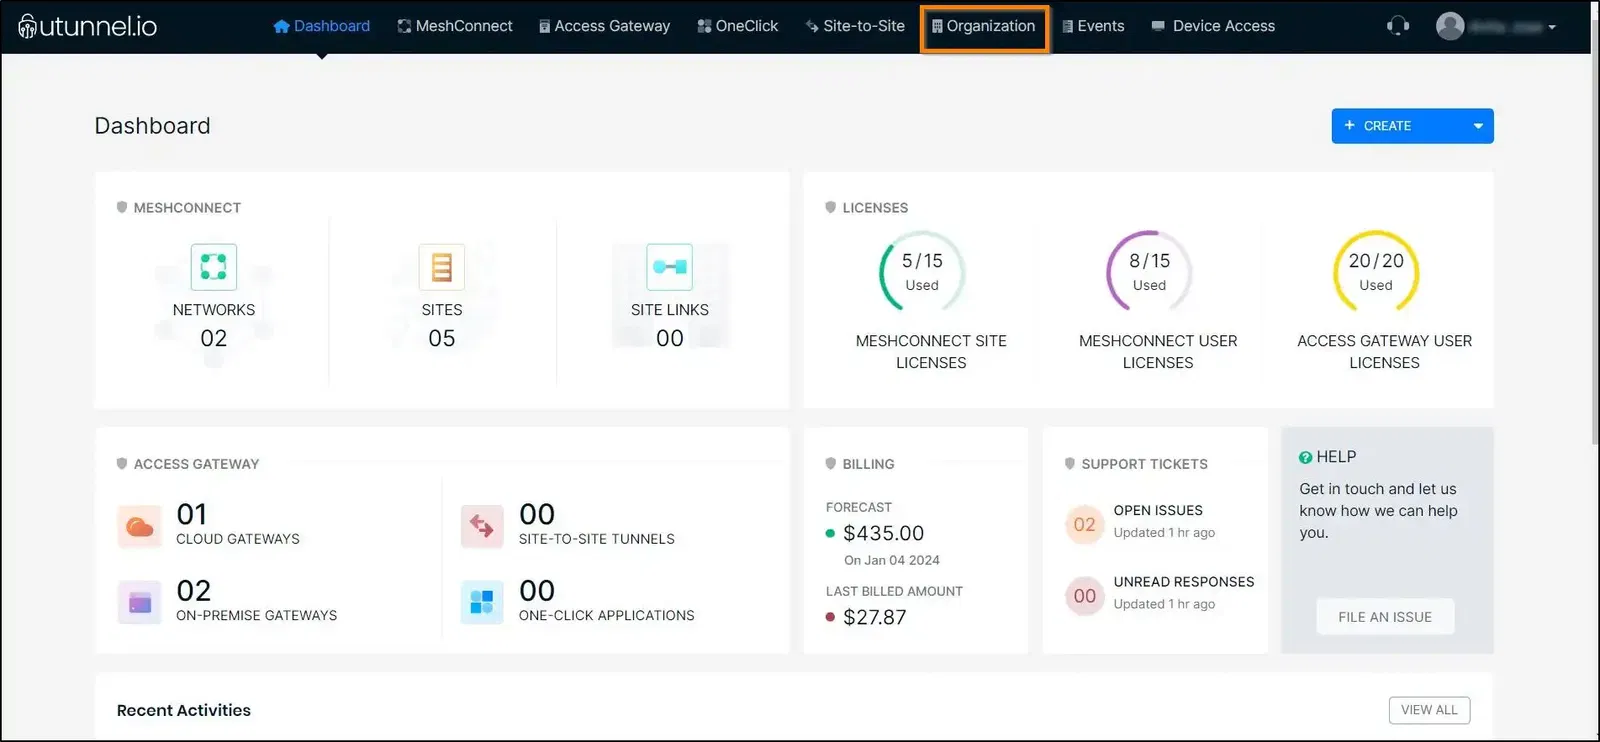
1. To activate SSO and use Okta as the identity provider on your UTunnel organization account, navigate to your Organization dashboard, and select the Organization tab.
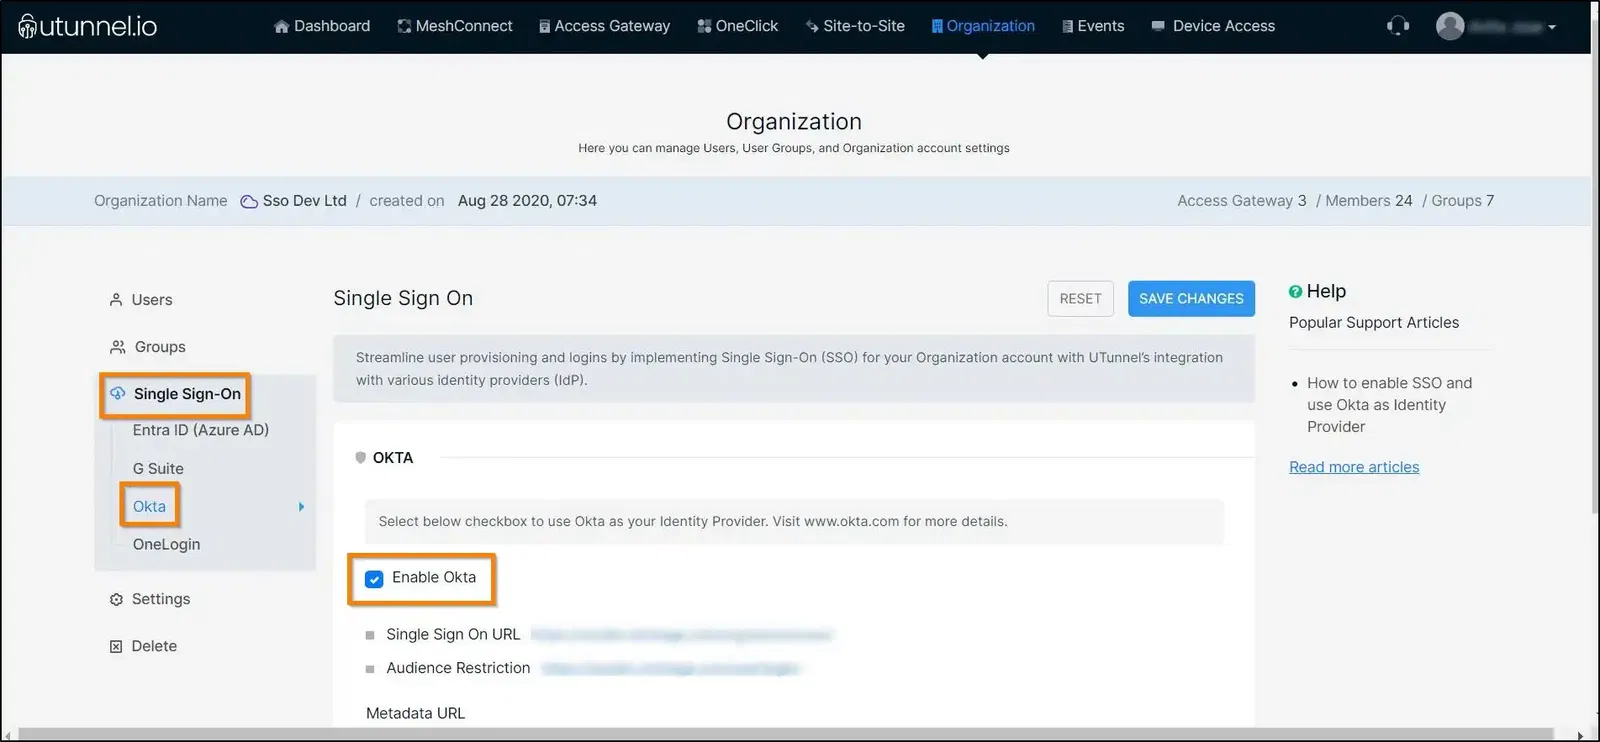
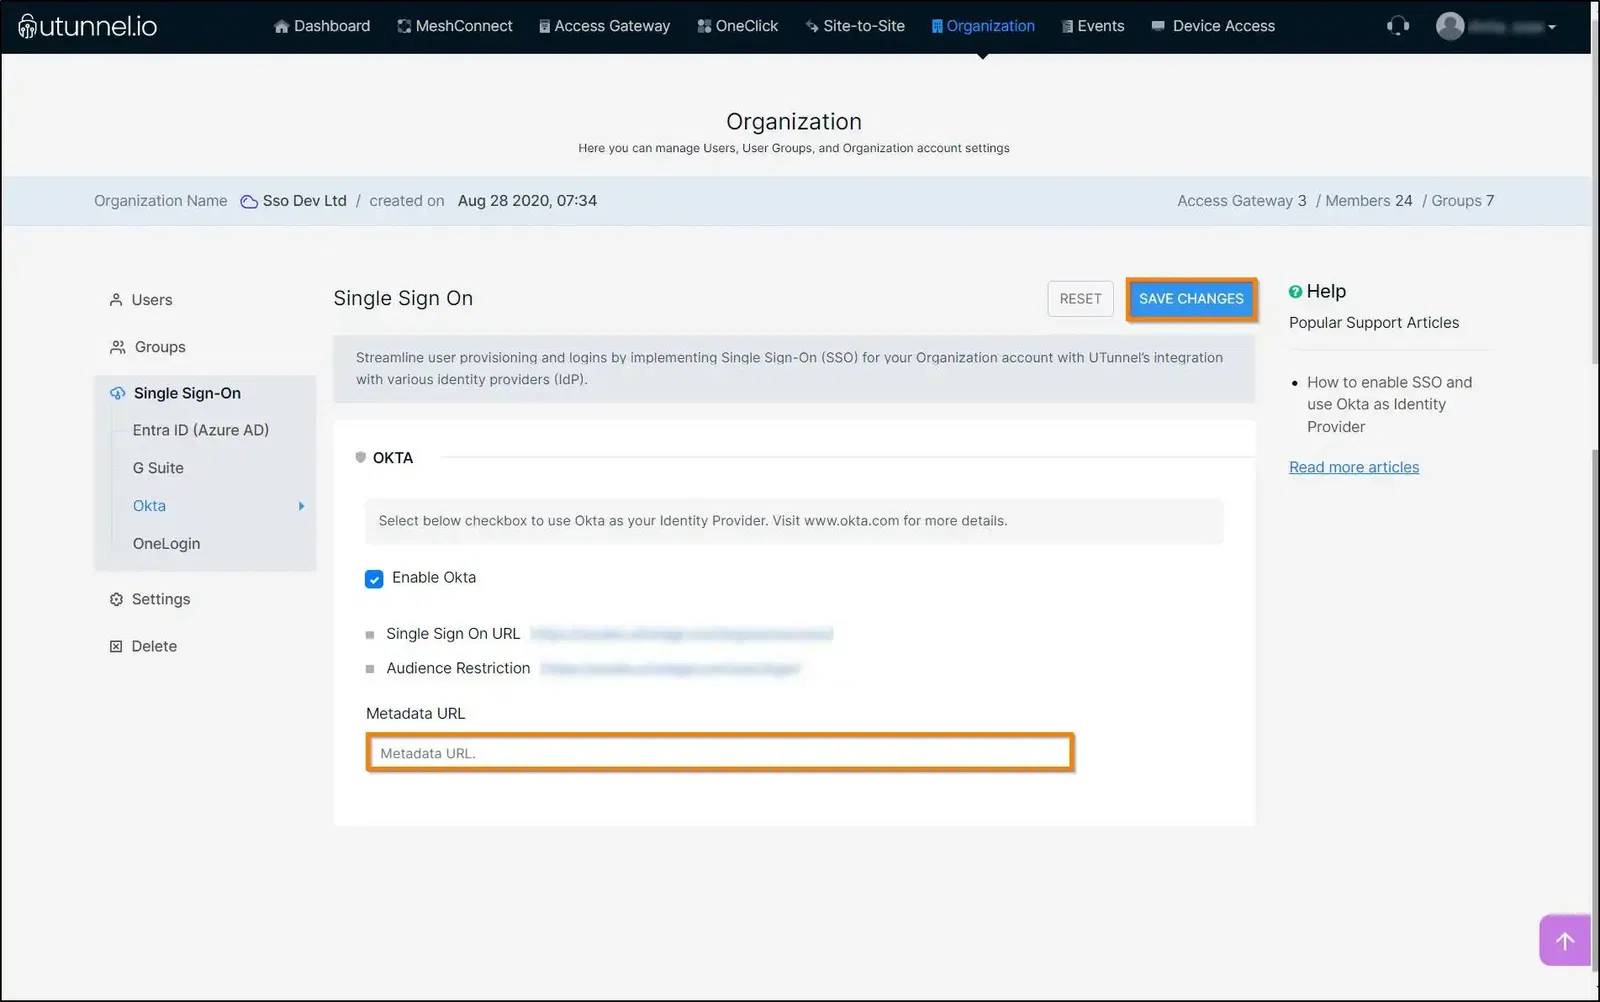
2. Navigate to the Single Sign On option in the left side menu and then click on Okta. Select the Enable Okta checkbox to enable Okta as your identity provider. Keep this page handy as the details will be required in the proceeding steps.
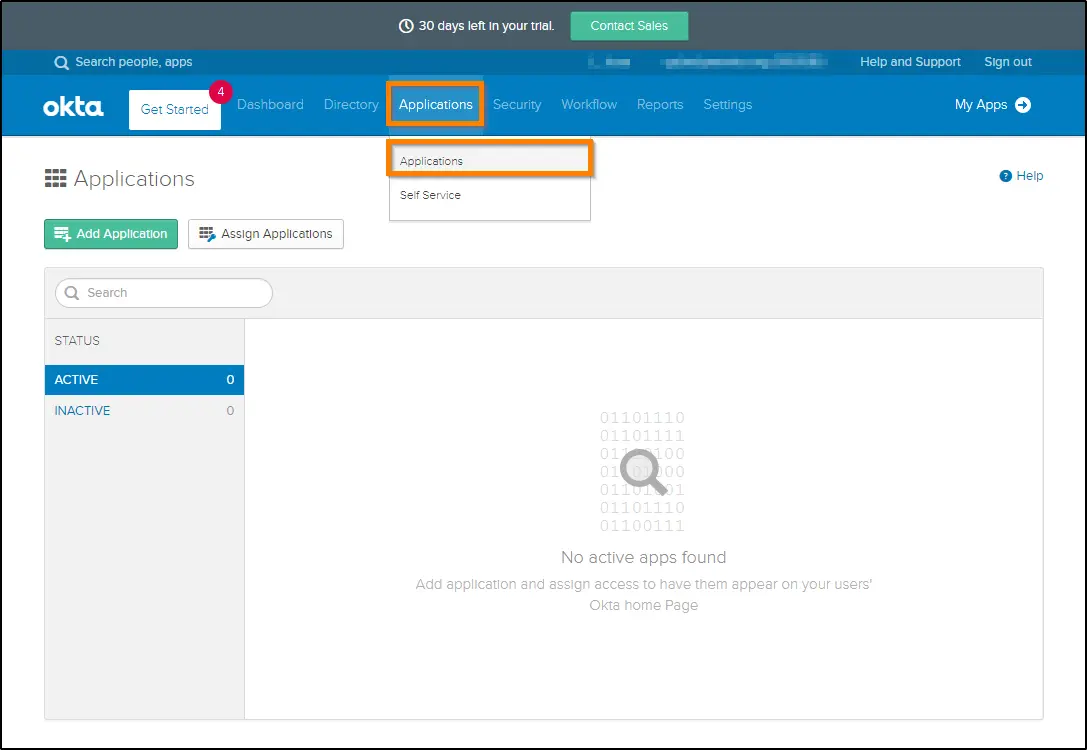
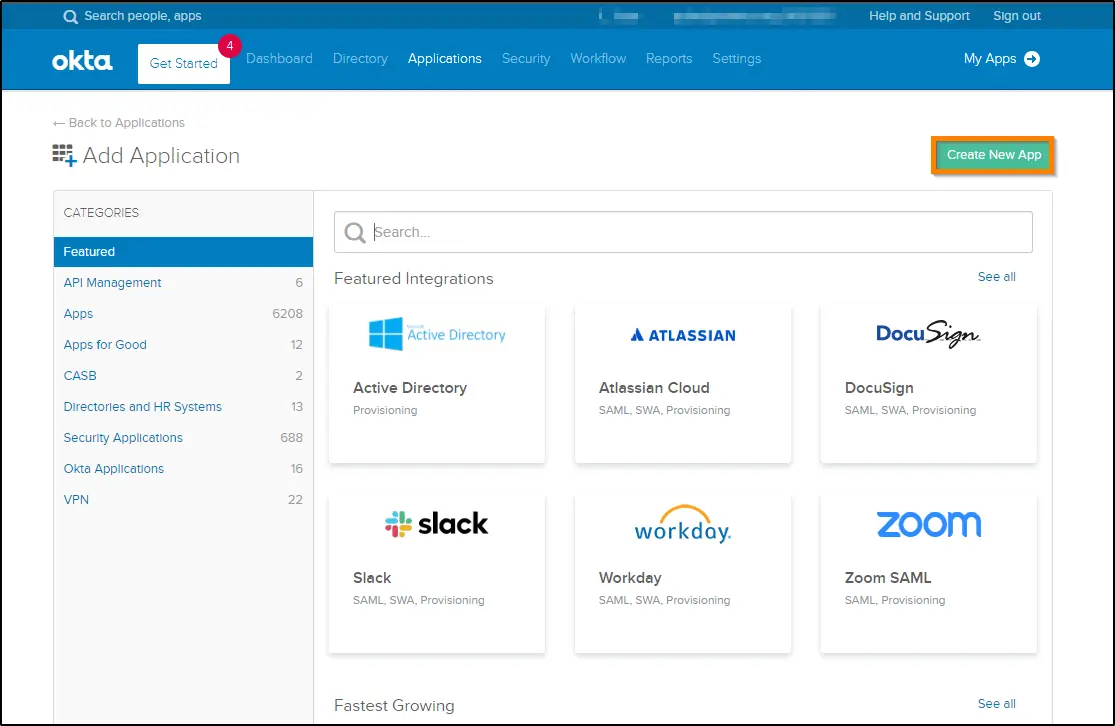
3. Now, you have to perform configurations at Okta. Log in to your organization's Okta portal and select the Applications menu within the Applications tab.
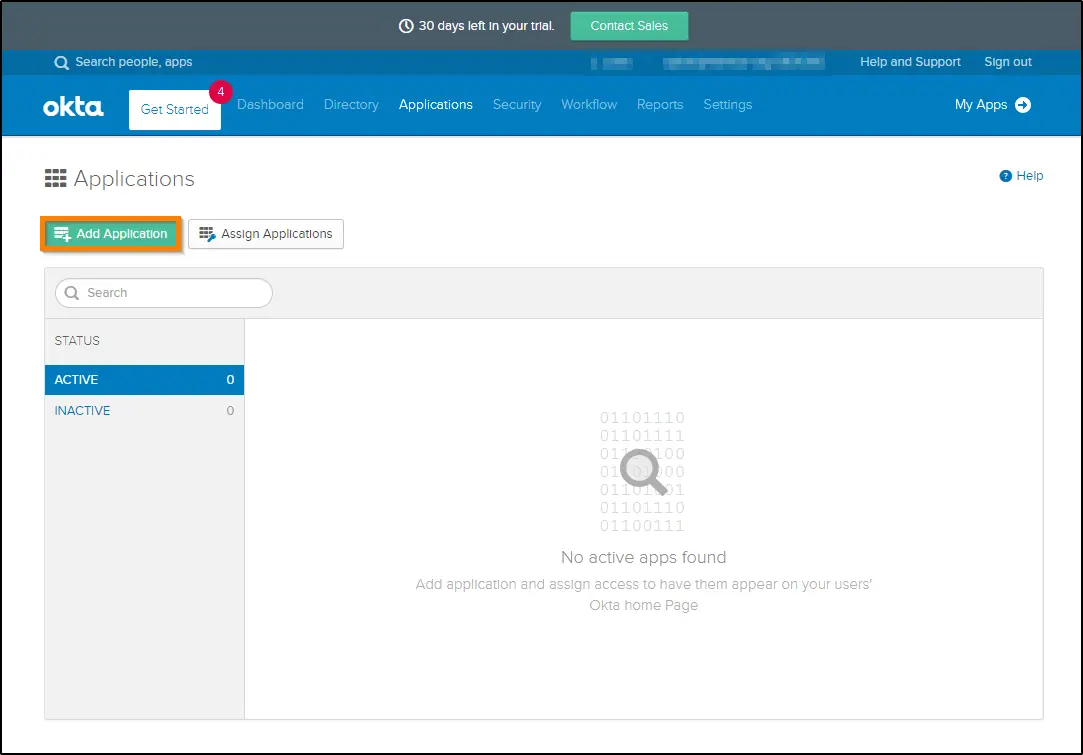
4. Click on the Add Application button at the top left of the screen.
5. Click on the Create New App button at the top right of the screen.
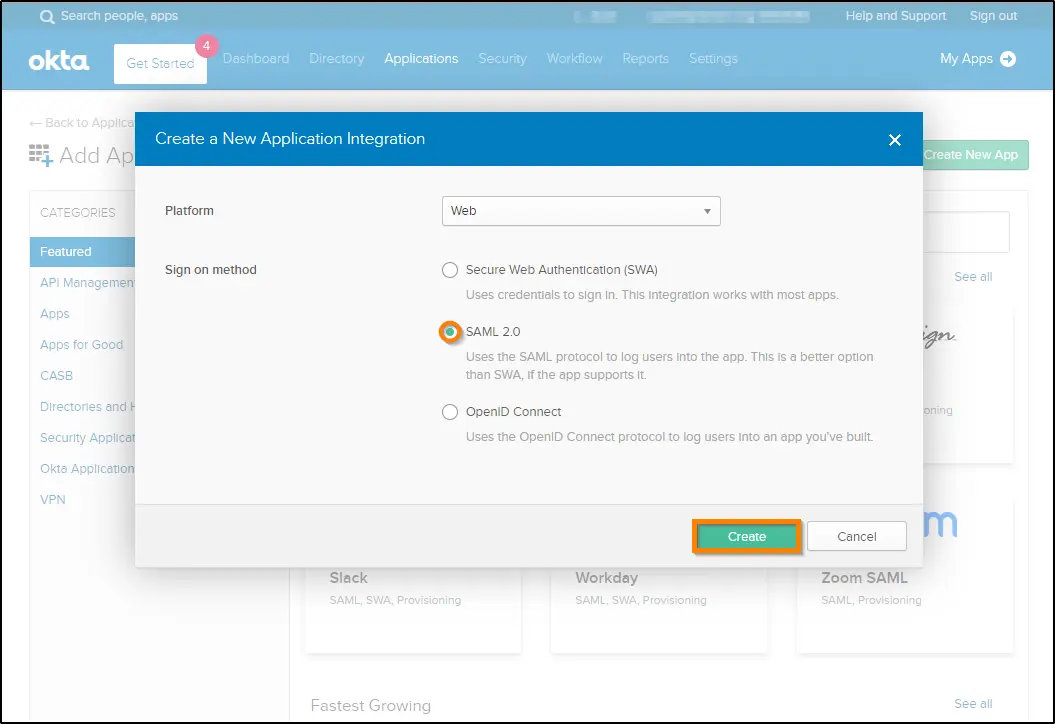
6. A new window pops up. Select Web for the Platform field and enable SAML2 for the Sign-on method field. Click on the Create button.
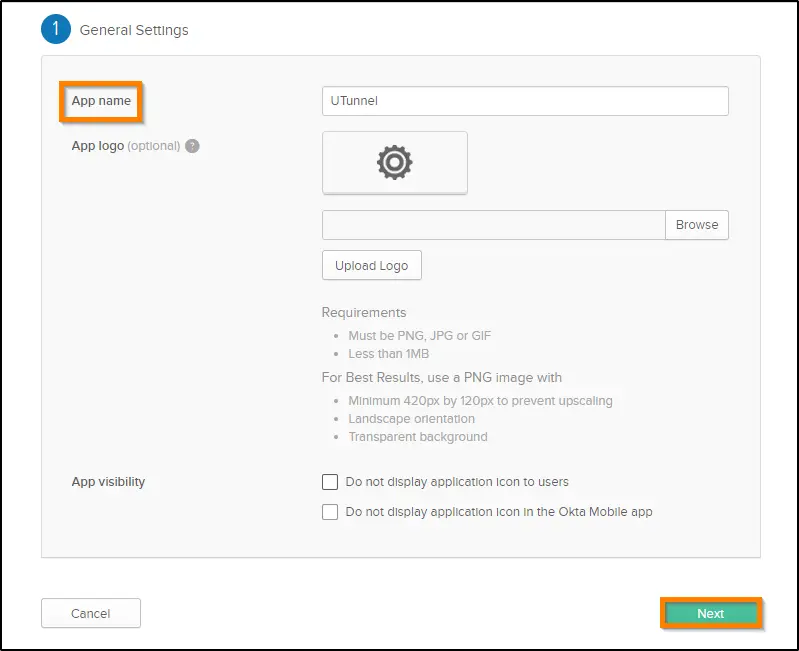
7. Enter any preferred name in the App Name field and click on the Next button to proceed. Here we have named it as UTunnel.
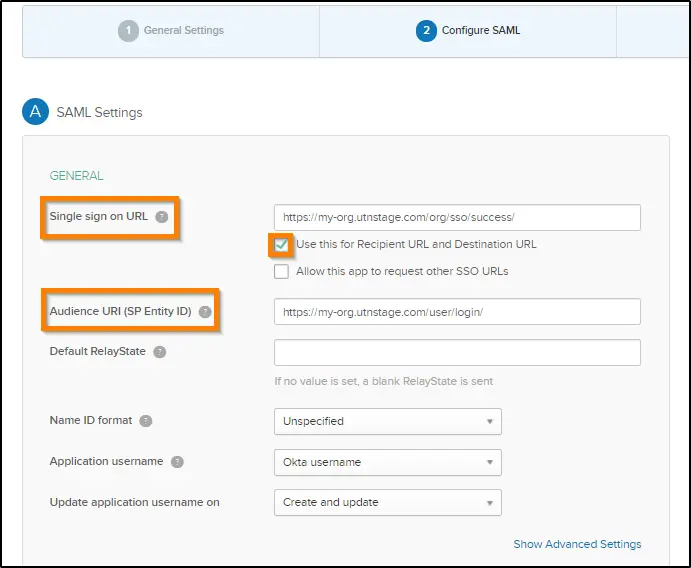
8. Next, you need to configure the necessary integration URLs and SAML attributes. You will need the details obtained from step #2 here.
Set the SAML attributes as follows. Please note that these attributes are case sensitive. Click Add Another to add each field as given below:
| Name | Name Format | Value |
| FirstName | Basic | user.firstName |
| LastName | Basic | user.lastName |
| Unspecified | user.email |
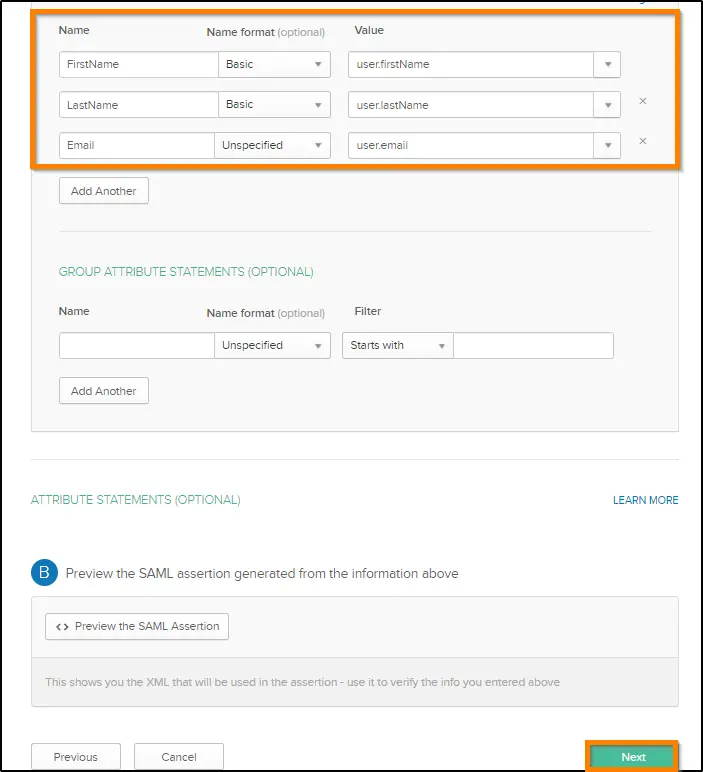
Now click on the Next button to proceed.
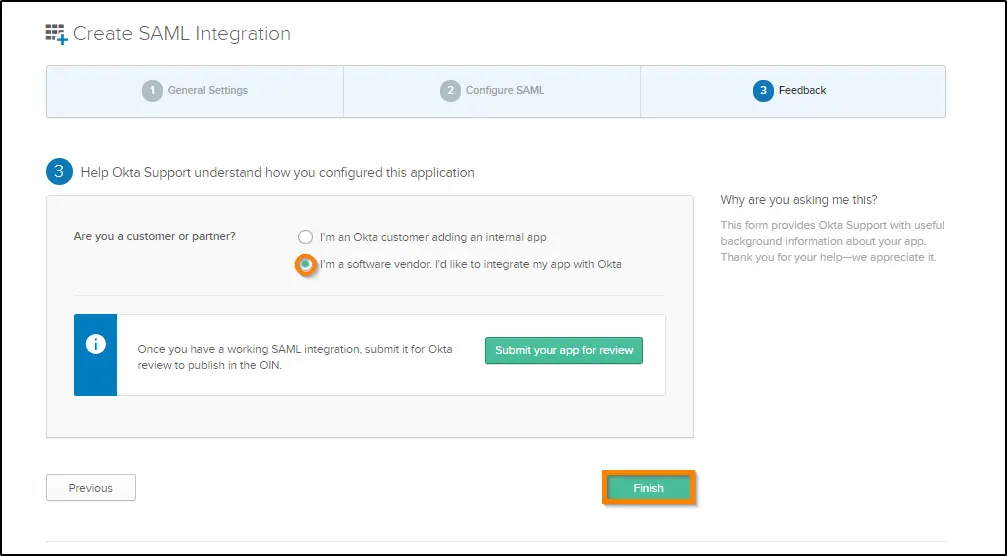
9. In the Feedback section, select an option based on your role and click on the Finish button.
10. Now you will reach the Applications screen. Scroll down to find the Sign On tab. Find the Identity Provider metadata below the Sign On Methods section and click on the same.
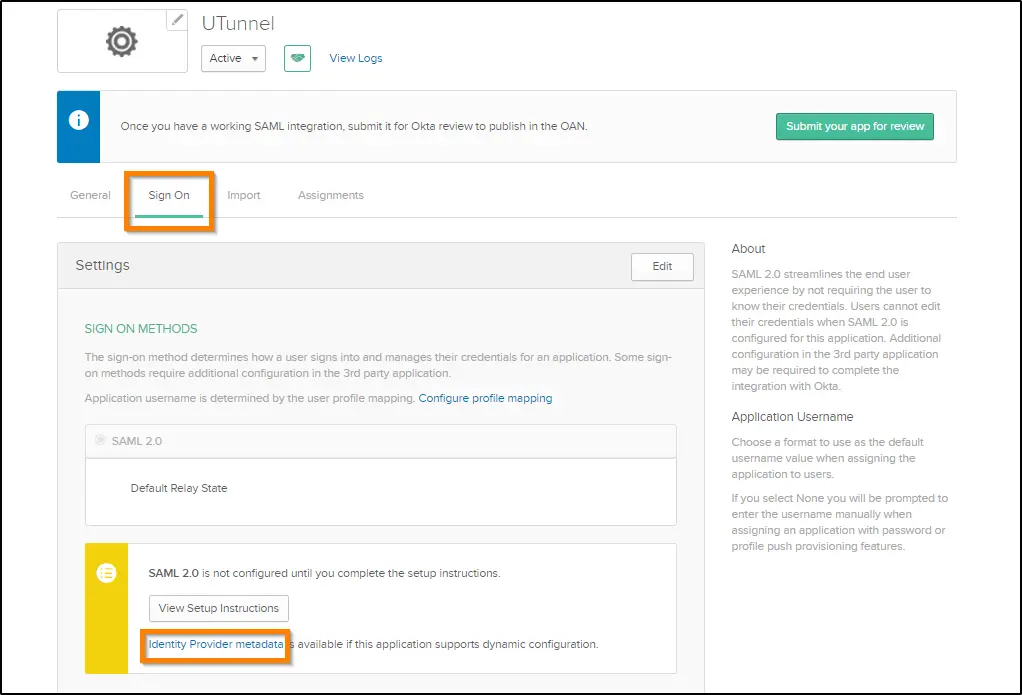
11. The Identity Provider metadata opens in a new window. Copy the URL from the browser.
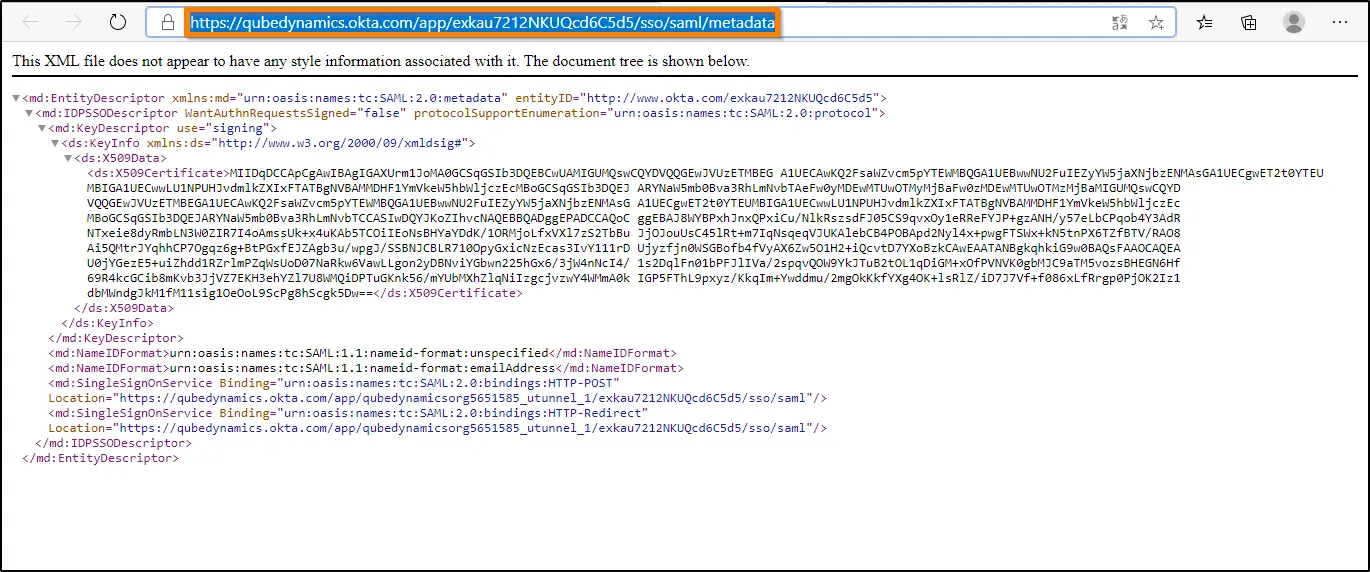
12. Now navigate to the UTunnel dashboard and paste it into Metadata URL field. Click on the SAVE CHANGES button.
That's it. Okta integration is complete now. Users with active Okta login and necessary privileges can log in to your organization's UTunnel dashboard. However, the organization owner has to log in with a registered email and password, and not with an Okta account.