Updated on 05 Sep, 2023
You can download the manual OpenVPN configuration (.OVPN) file from the UTunnel web console and use it to connect to your UTunnel VPN server using the native OpenVPN client application for Windows. To use this option you need to enable manual OpenVPN connections first from the server settings.
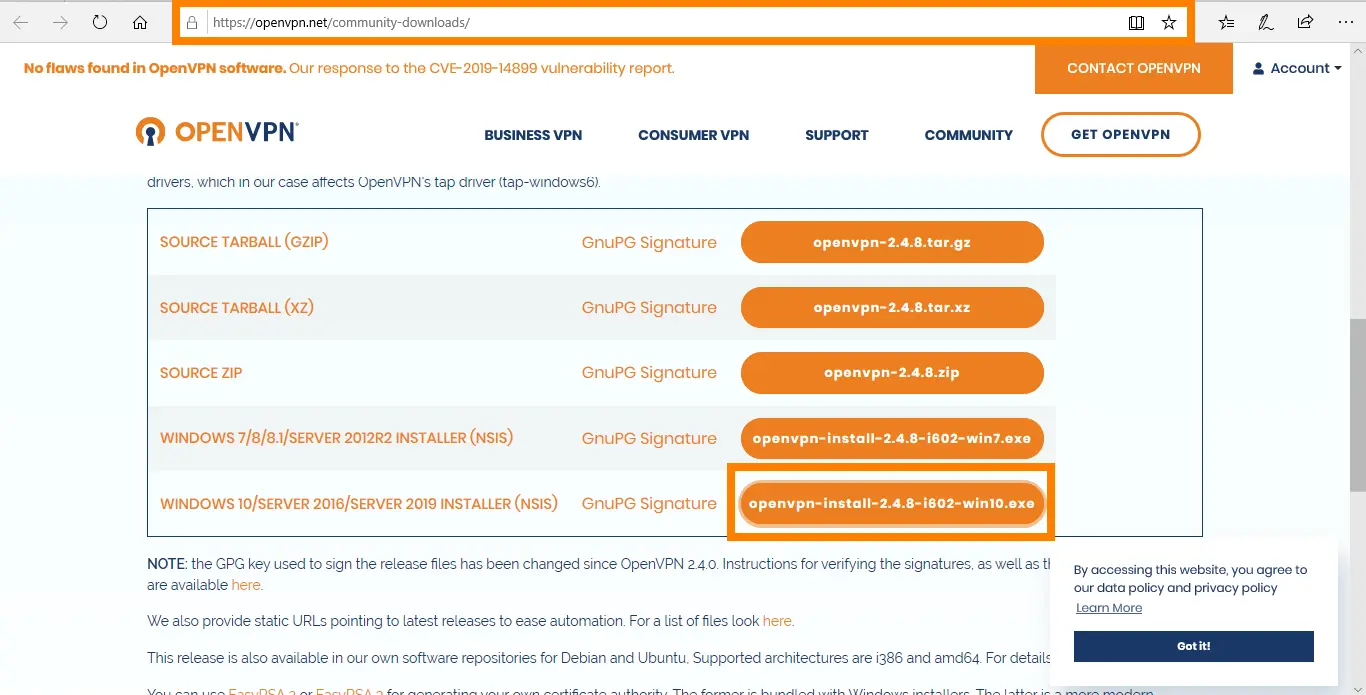
1. Download and install the OpenVPN client compatible with your Windows version.
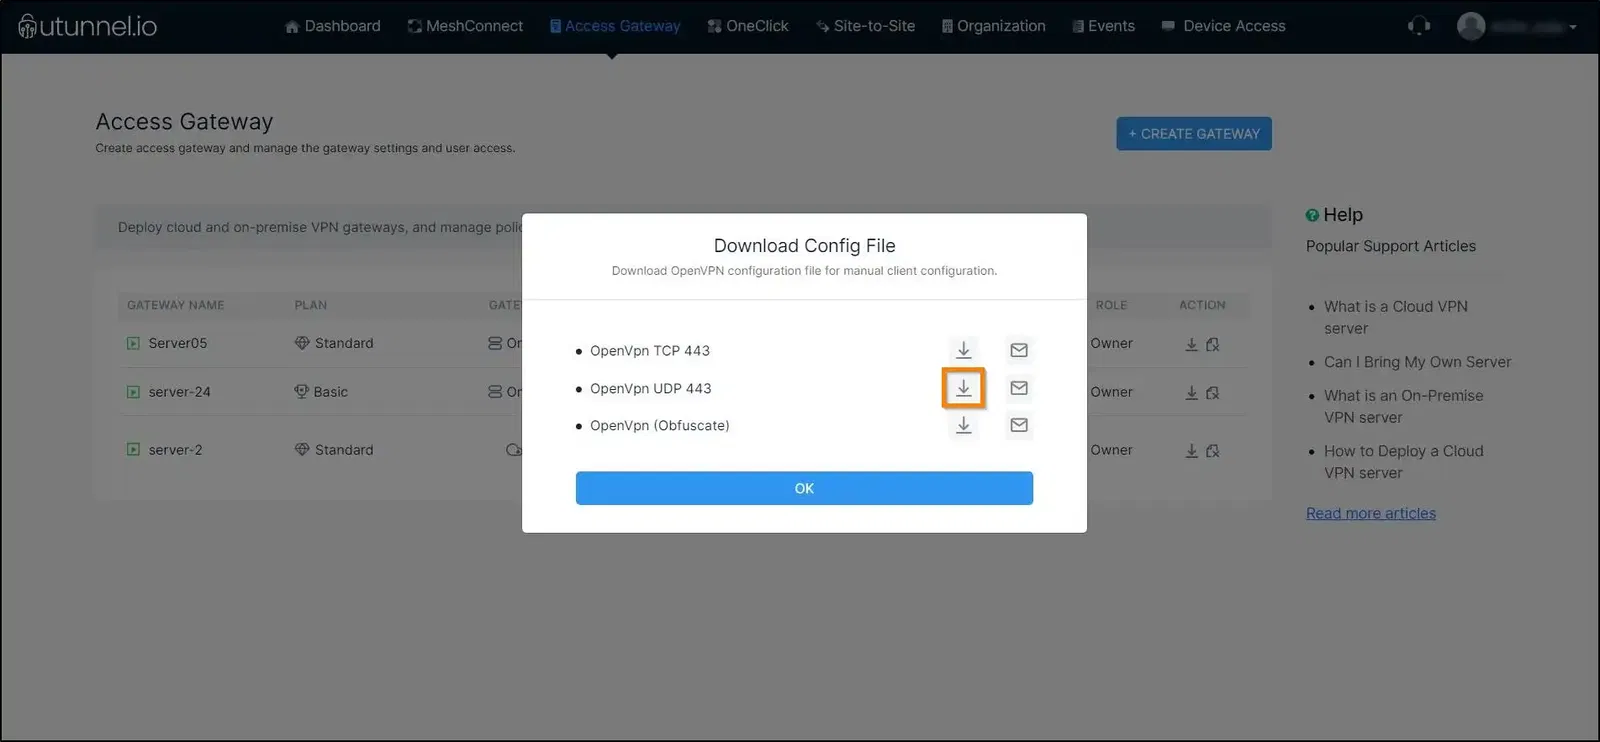
2. Log in to the UTunnel dashboard and download the .OVPN file and save it in an easily accessible location.
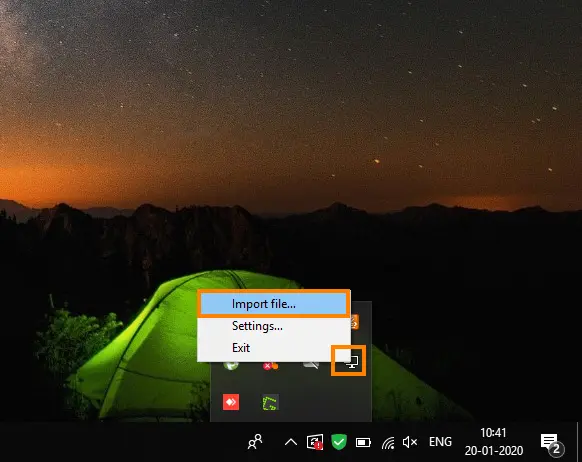
3. Right-click on the OpenVPN GUI icon from the system tray toward the bottom of the screen. Select the Import file option.
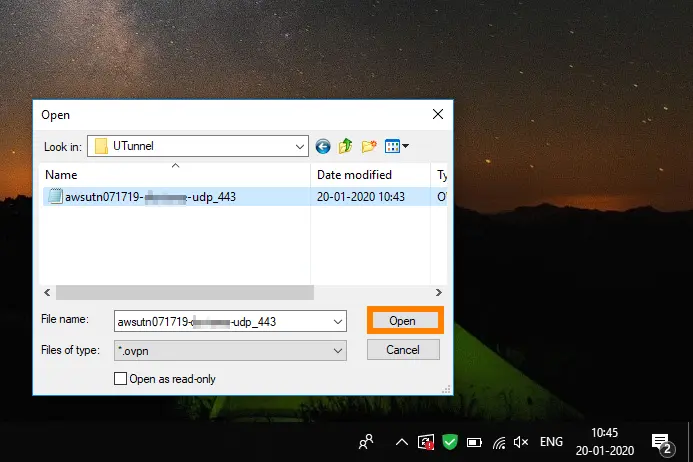
4. Select the OVPN file saved at your preferred location. Click the Open button to import the file.
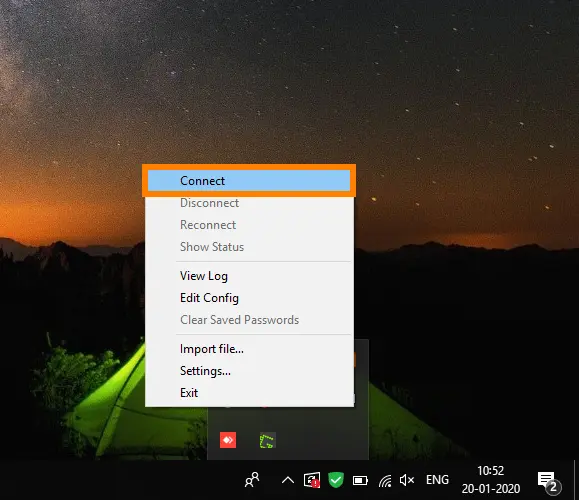
5. Right-click on the OpenVPN icon from the system tray and click on the Connect button
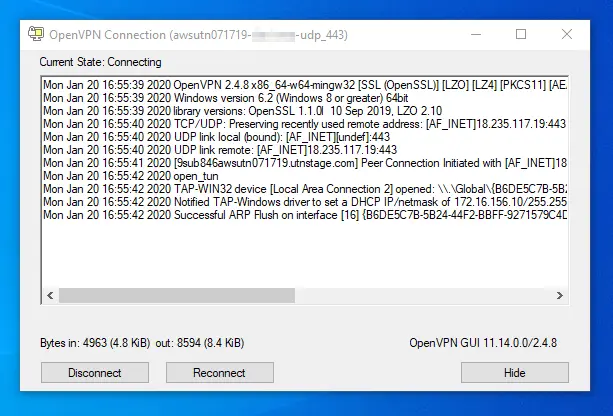
6. A new window displaying the VPN logs and connection status opens up.
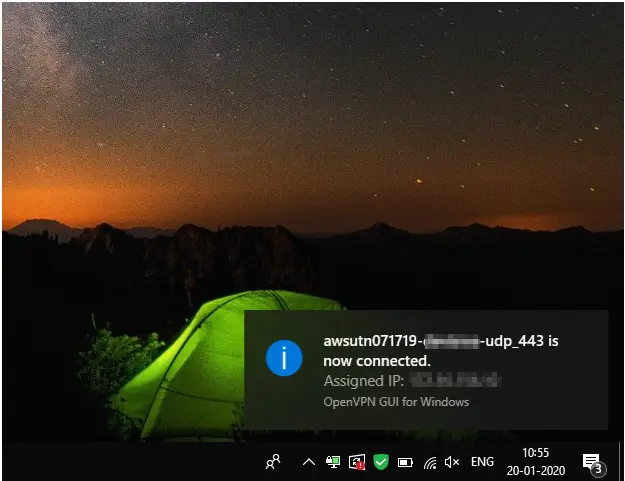
7. A message confirming the status of the VPN connection pops at the bottom right corner of the screen. Now you are connected to your UTunnel VPN server on your Windows device using the native OpenVPN client application.